SharePoint is a powerful collaboration hub, but it still lacks one small thing — an intuitive way to collect quick votes or ratings from many users at once. That’s where Infowise Ultimate Forms steps in with its Voting column functionality — turning a regular list or document into an interactive polling board.
Voting columns are especially useful when you need to:
- collect feedback from multiple users simultaneously,
- measure content usefulness (like FAQ ratings),
- vote on options (events, ideas, lunch choices),
- show vote ranking + percentages,
- track voters for transparency or keep polls anonymous.
For this tutorial, we will use a realistic example:
We want our users to vote on catered lunch options .
So we create a very simple SharePoint list with restaurant names as the title, where approving or rejecting options happens directly from the list view, without opening forms.
We’ll build this list on:
- On-Premise version of Infowise
- Microsoft 365 version of Infowise
Instructions
Setup in On-Premises SharePoint
Step 1: Create a list for voting
- Go to your SharePoint site
- Create New Custom List
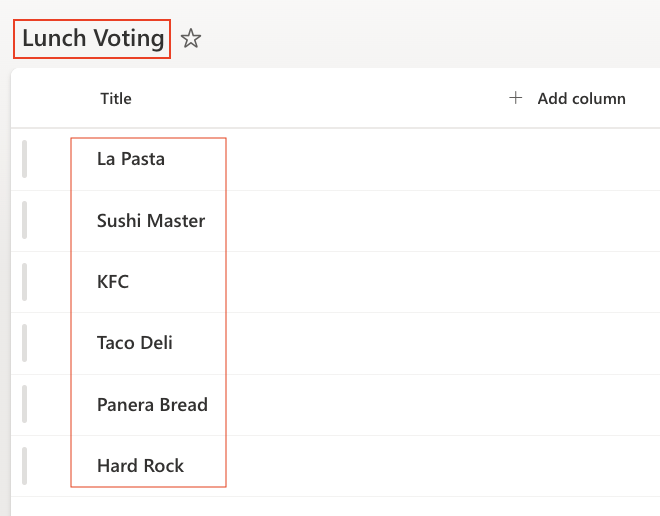
- Name the list: Lunch Voting
- Add test items manually:
- La Pasta
- Sushi Master
- KFC
- Taco Deli
- Panera Bread
- Hard Rock
We only use restaurant names in the Title — this keeps the example simple and human-readable.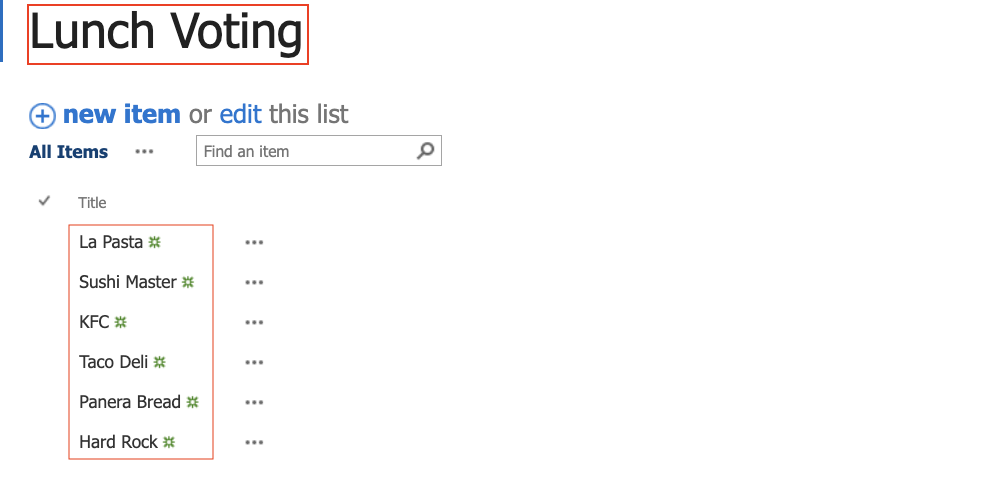
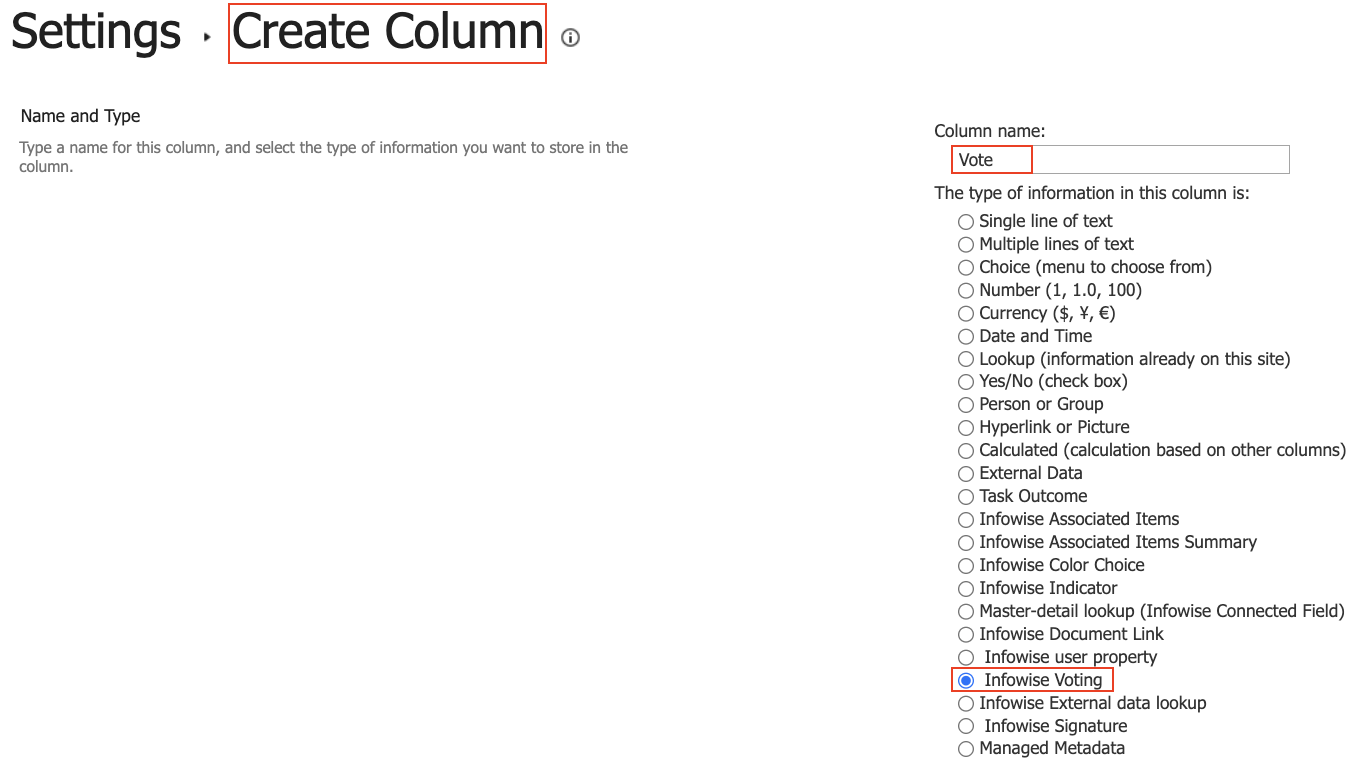
Step 2: Create the Voting column
- Open List Settings
- Click: Create Column
- Name your column: Vote
- Select type: Infowise Voting
- Save
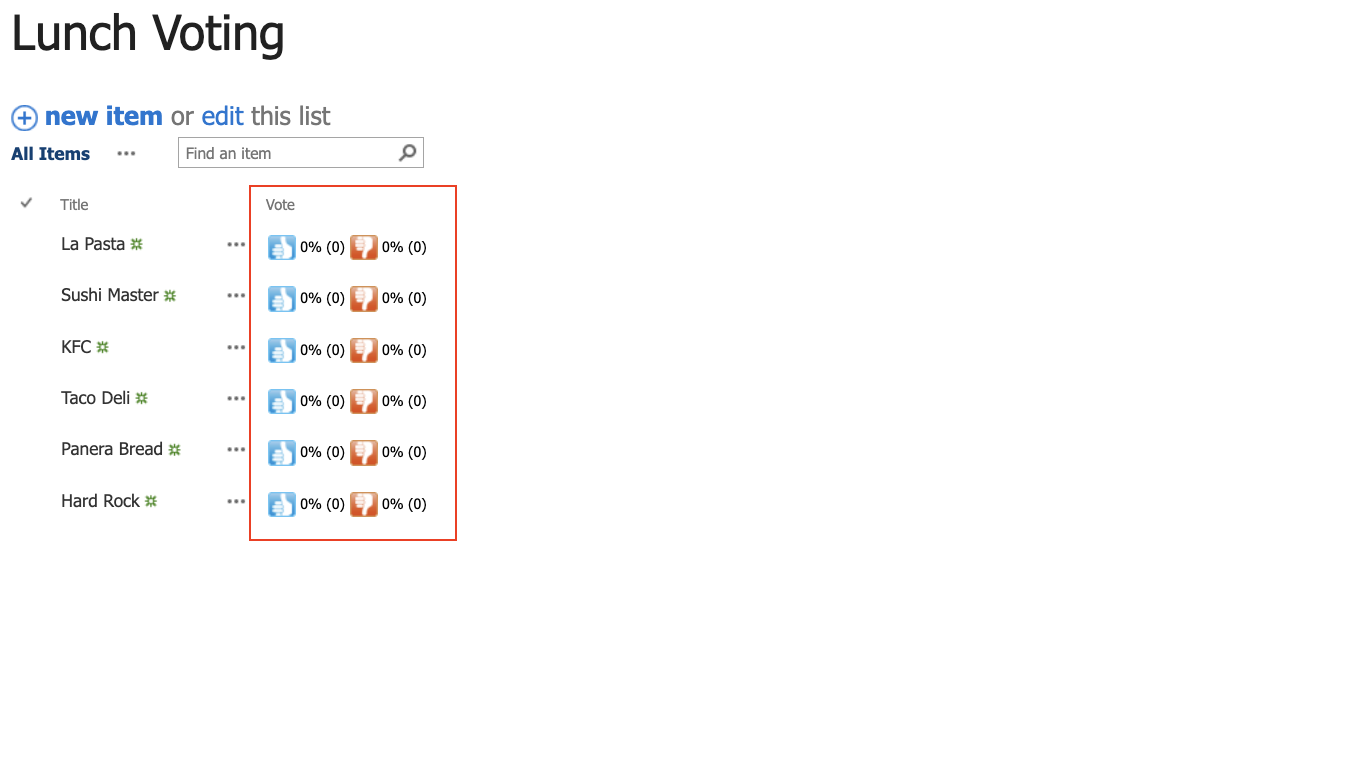
- Next navigate to your list to see what your Voting Column looks like.
Step 3: Configure voter transparency
- Open the Vote column settings
- Configure:
- Display Voters = ON (so we can see who voted)
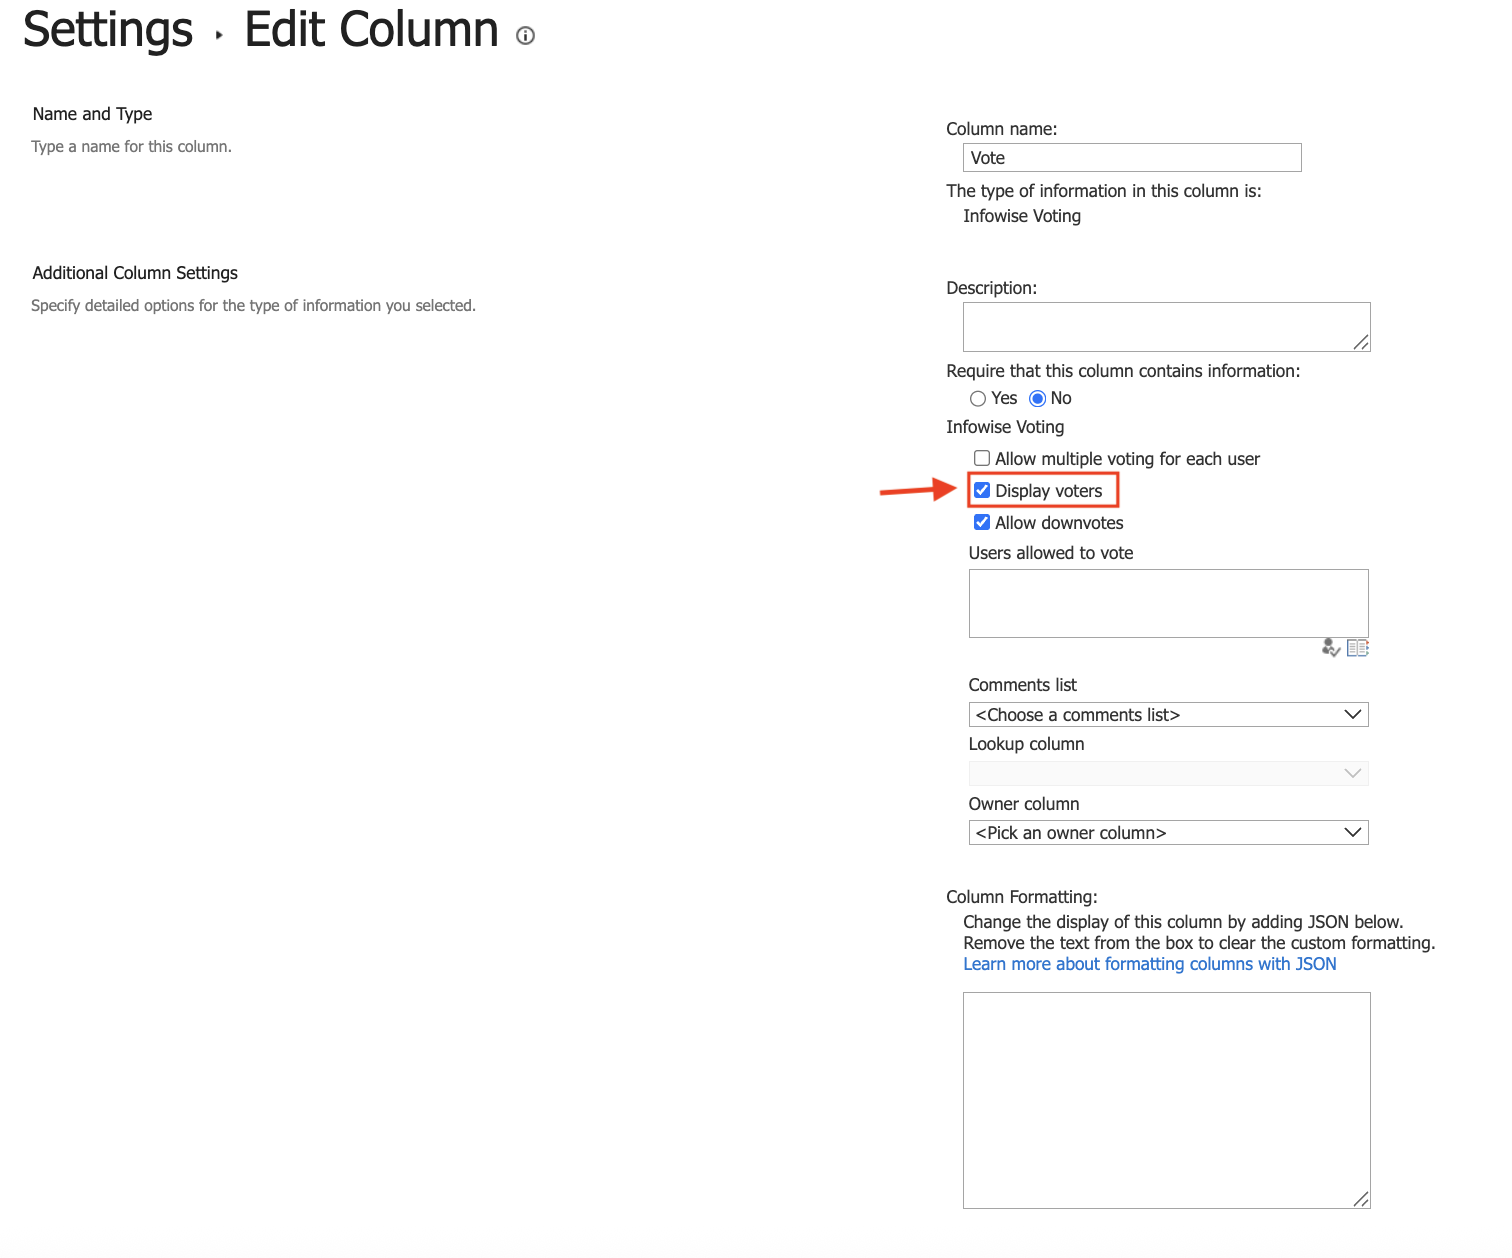
- Display Voters = ON (so we can see who voted)
This option helps you choose if voting should be anonymous or transparent.
Step 4: Configuration
In the same column properties explore:
- Allow multiple votes per user = leave OFF for now
- Allow downvotes = leave ON
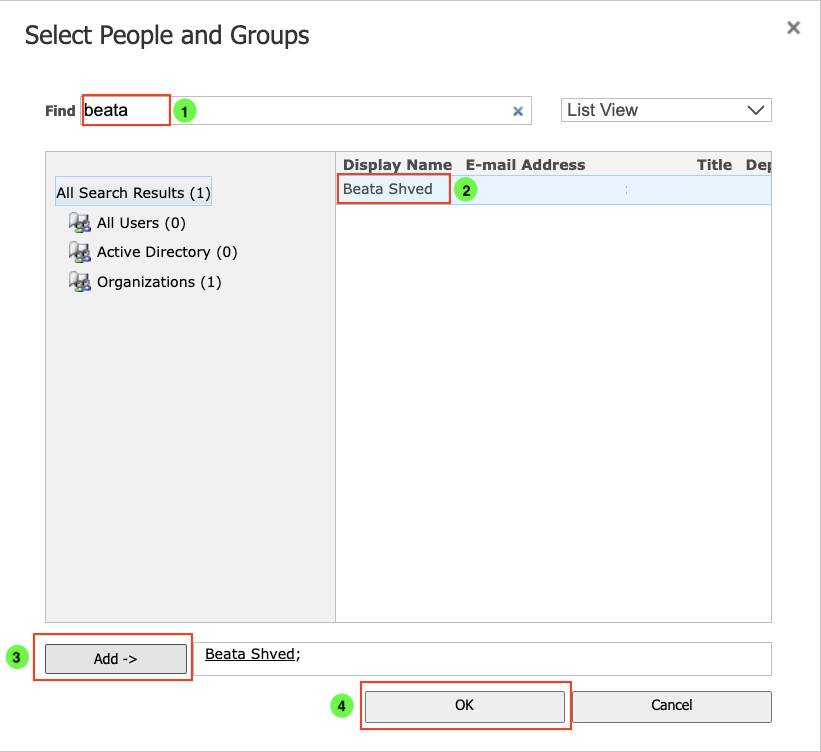
- Users allowed to vote (One extremely useful feature of the on-premise Infowise Voting Column is that we can select users or SharePoint groups that we want to vote.)
- click Address Book icon
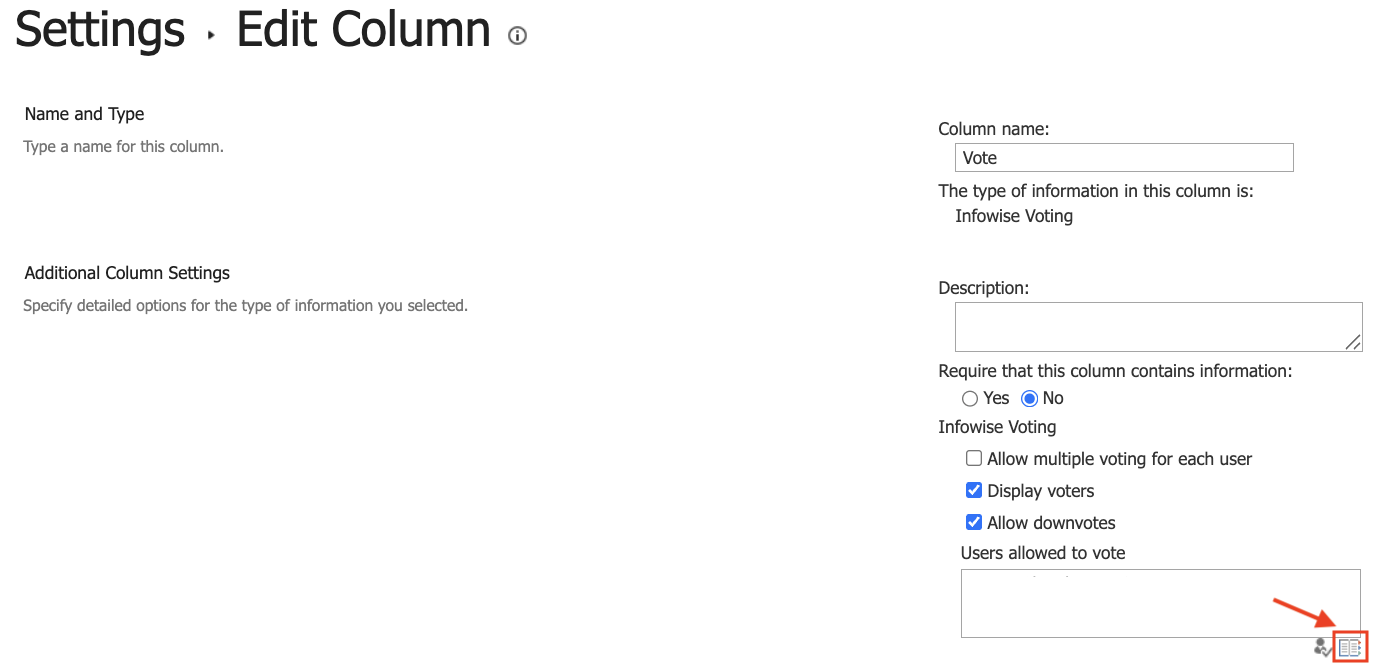
- Select specific users or SharePoint groups if you want to limit participation
- Specify Owner column = leave empty for now
- Save
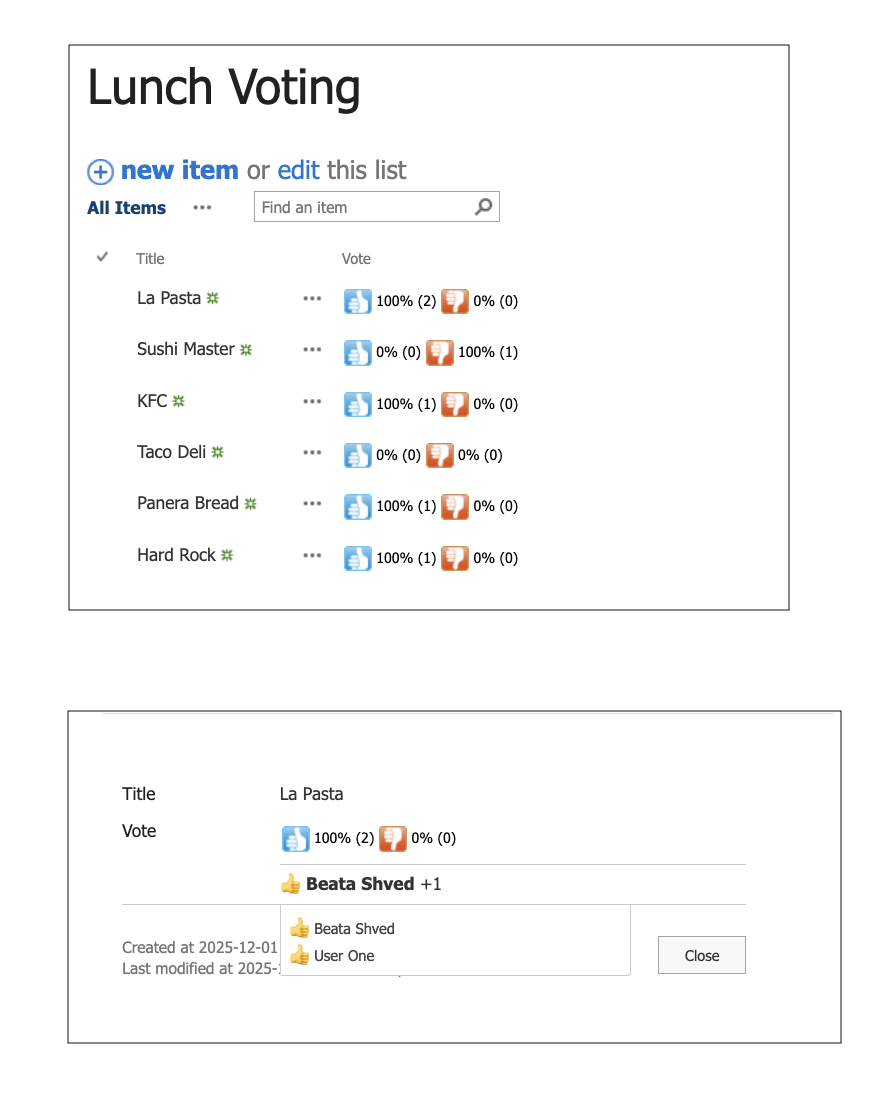
Expected behavior
- Go back to the main list view
- You will now see voting buttons next to every item
- Vote for any restaurant by clicking
- To see the vote record: Click: View Item
Inside the item you will see:
- Voter name
- Vote value
- Vote % and totals
Setup in SharePoint Online (Microsoft 365)
Setting up an Infowise Voting column in the Microsoft 365 version of Infowise is similarly easy, but instead of using our List Settings page we will use the Infowise Design Screen.
Step 1: Create the same example list
- Open your SharePoint site
- Create New Custom List
- Name it again: Lunch Voting
- Add the same items:
- La Pasta
- Sushi Master
- KFC
- Taco Deli
- Panera Bread
- Hard Rock
Step 2: Open Designer
- Open Design
- Go to: Columns → Voting
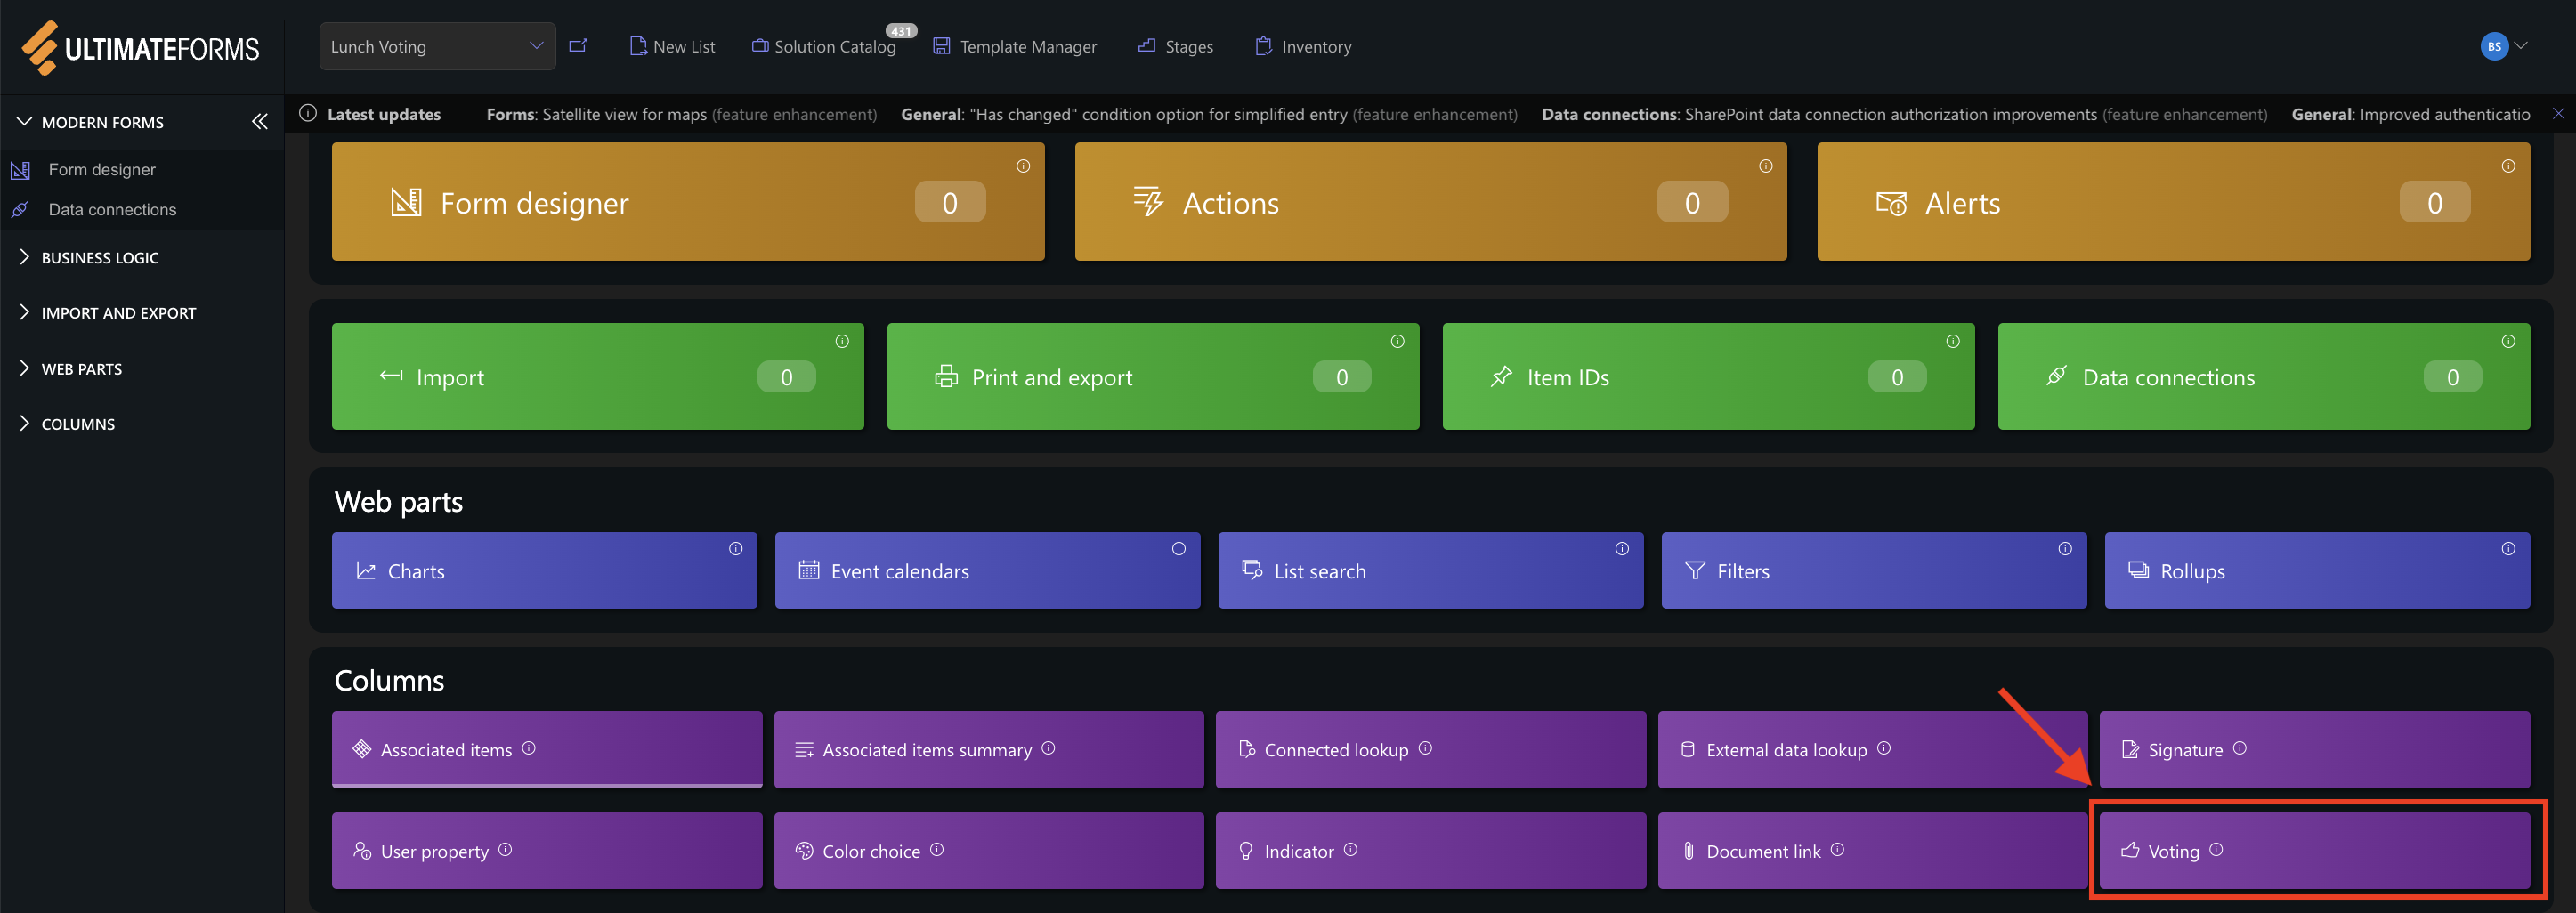
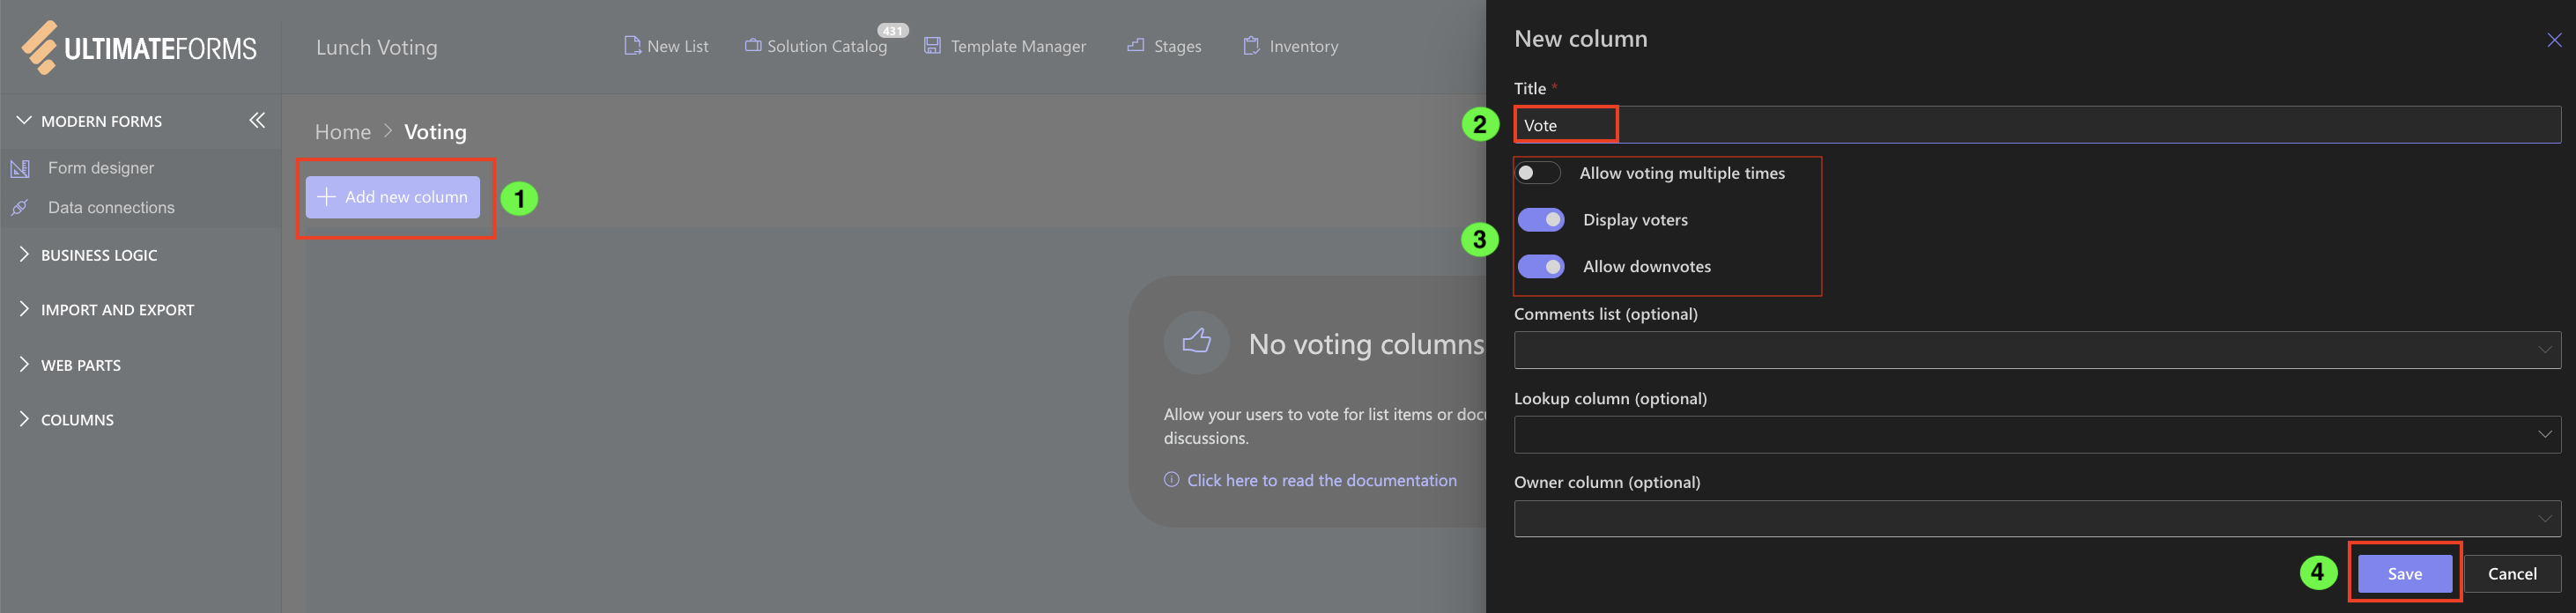
- Add new Column
- Name your column: Vote
- Configure the Online settings:
- Allow voting multiple times = optional select ON/OFF depending UX
- Display voters = optional ON/OFF for transparency or anonymous
- Allow downvotes = ON/OFF depending need
- Owner column = optional
- Save
If we navigate back to our list, we can see that the Voting Column has been added as expected. 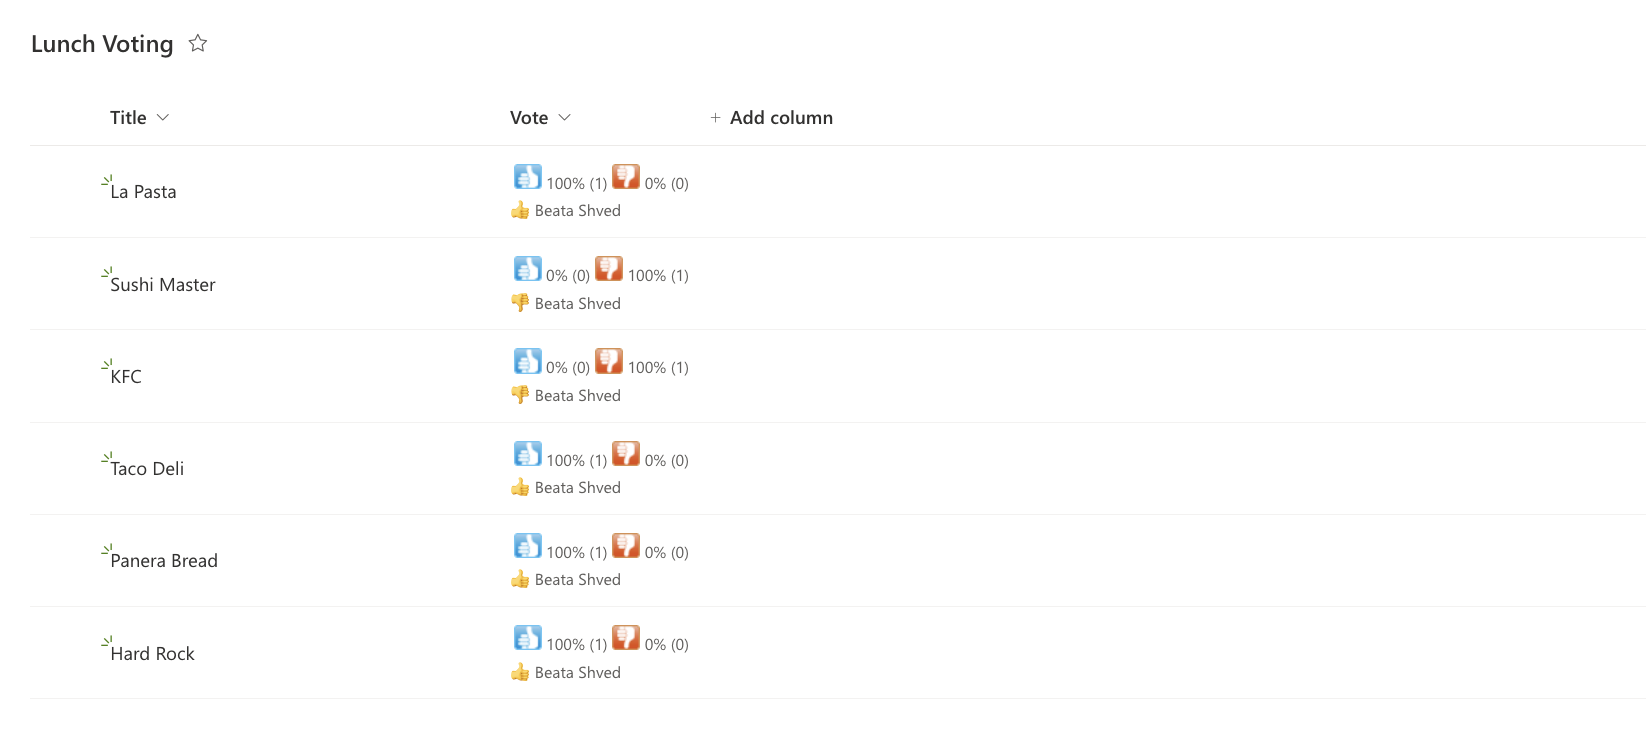
Watch this quick video walkthrough from Infowise:
Summary
In this tutorial, we discussed the set up and use of the Infowise Voting column as well as its various settings. Next, we’ll configure an Owner column and enable comments and discussions below item details.