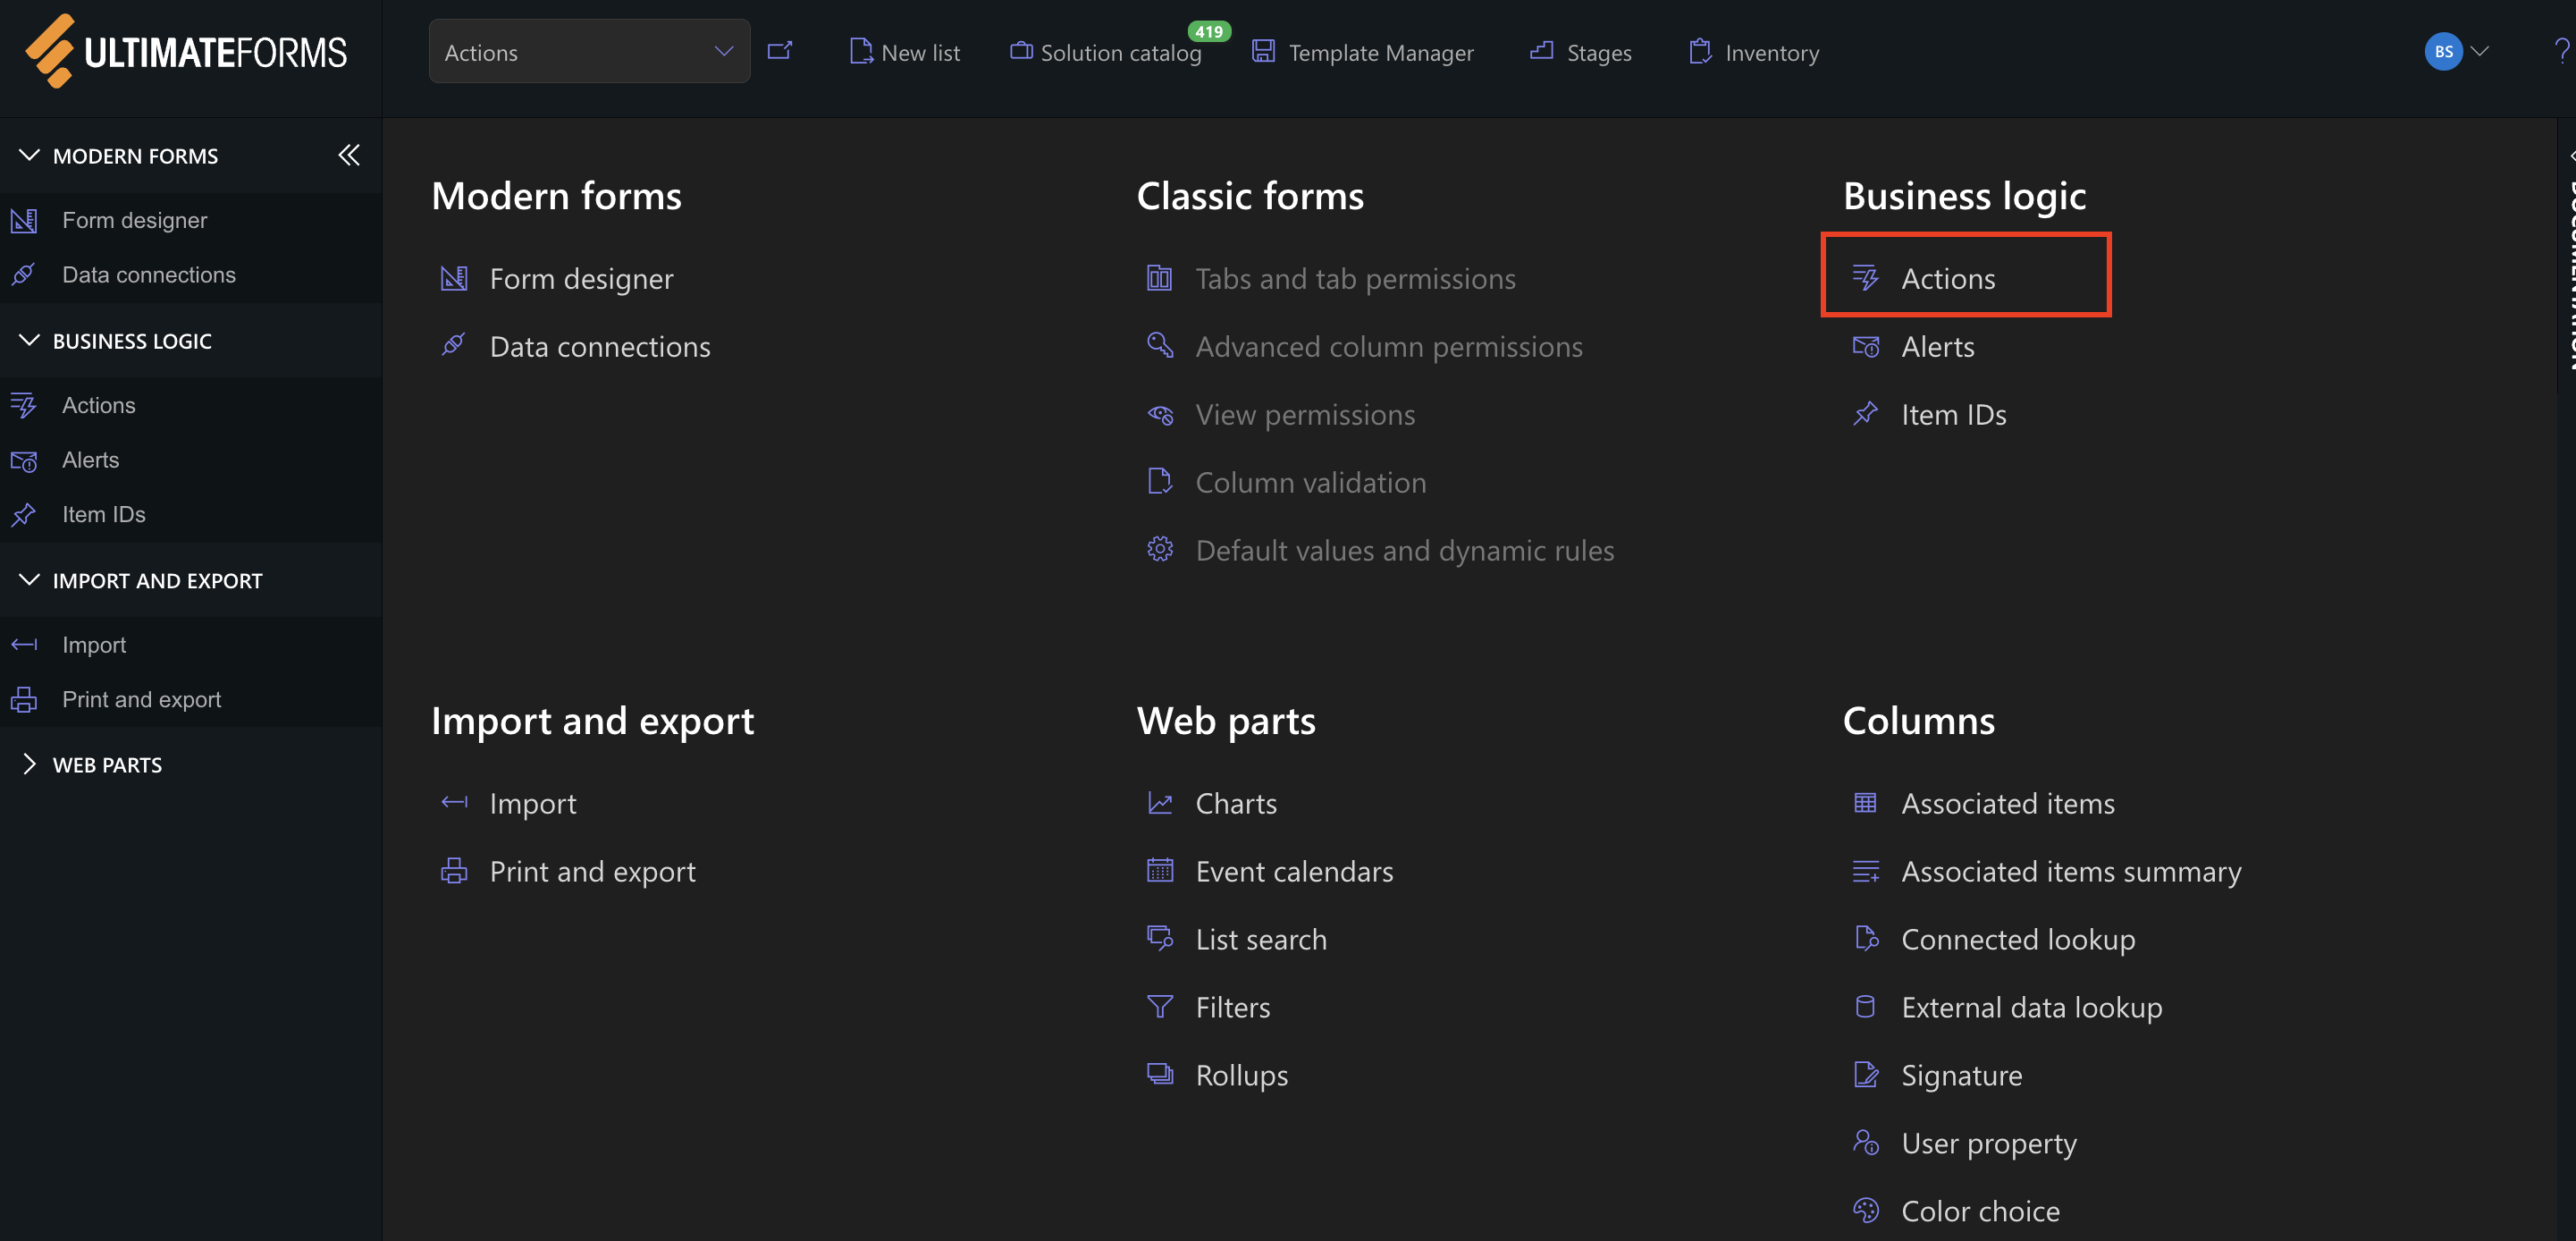
Ultimate Forms: Actions are a core feature of Infowise Ultimate Forms that allow you to automate business logic in SharePoint with zero code. Whether you're building a simple update trigger or a multi-step workflow involving list items, permissions, and external services like Teams or Exchange, Actions help streamline your processes directly from within the SharePoint interface.
With support for Microsoft 365 and On-Premises environments, Ultimate Forms: Actions integrates seamlessly with both Classic and Modern SharePoint, adapting to your business needs. In this tutorial, you’ll learn how to set up Smart Actions Ultimate Forms: Actions
Before getting started, ensure:
- Infowise Ultimate Forms is installed and activated on your SharePoint list or library.
- You have sufficient design permissions.
- You are working in a Modern SharePoint interface for full compatibility with new features.
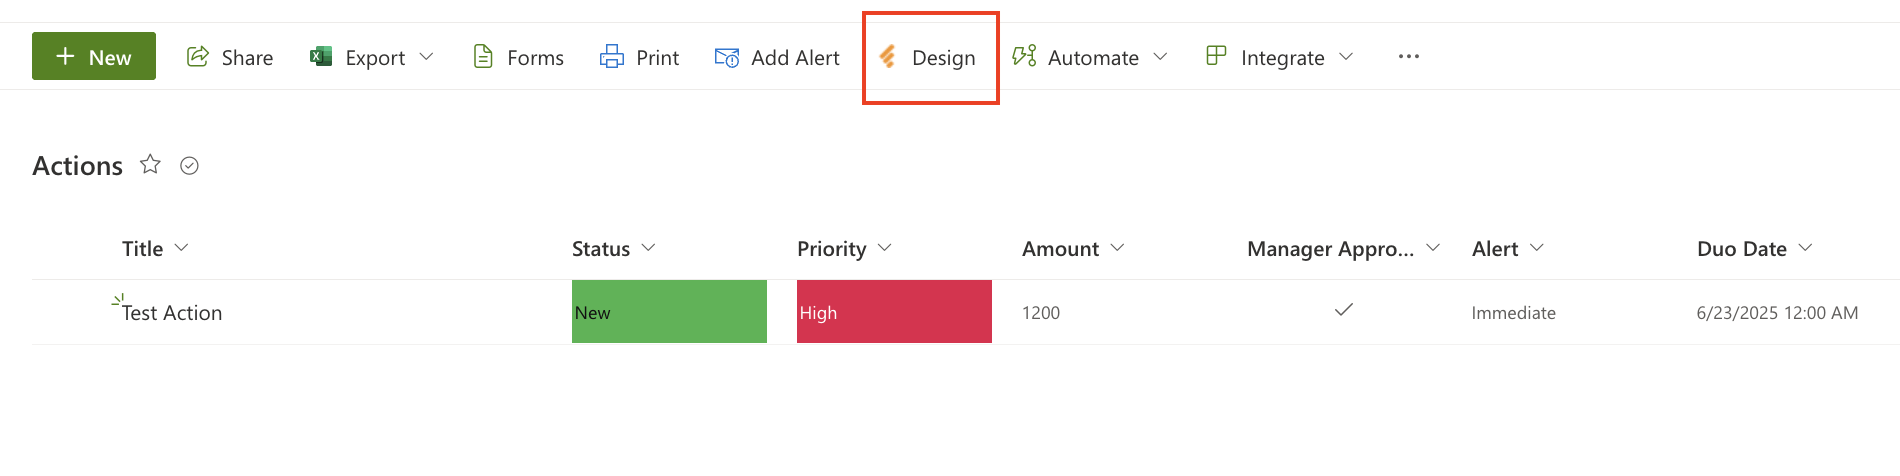
Step 1: Open the Action Designer
- Go to your SharePoint list or library.
- Click Design from the command bar.
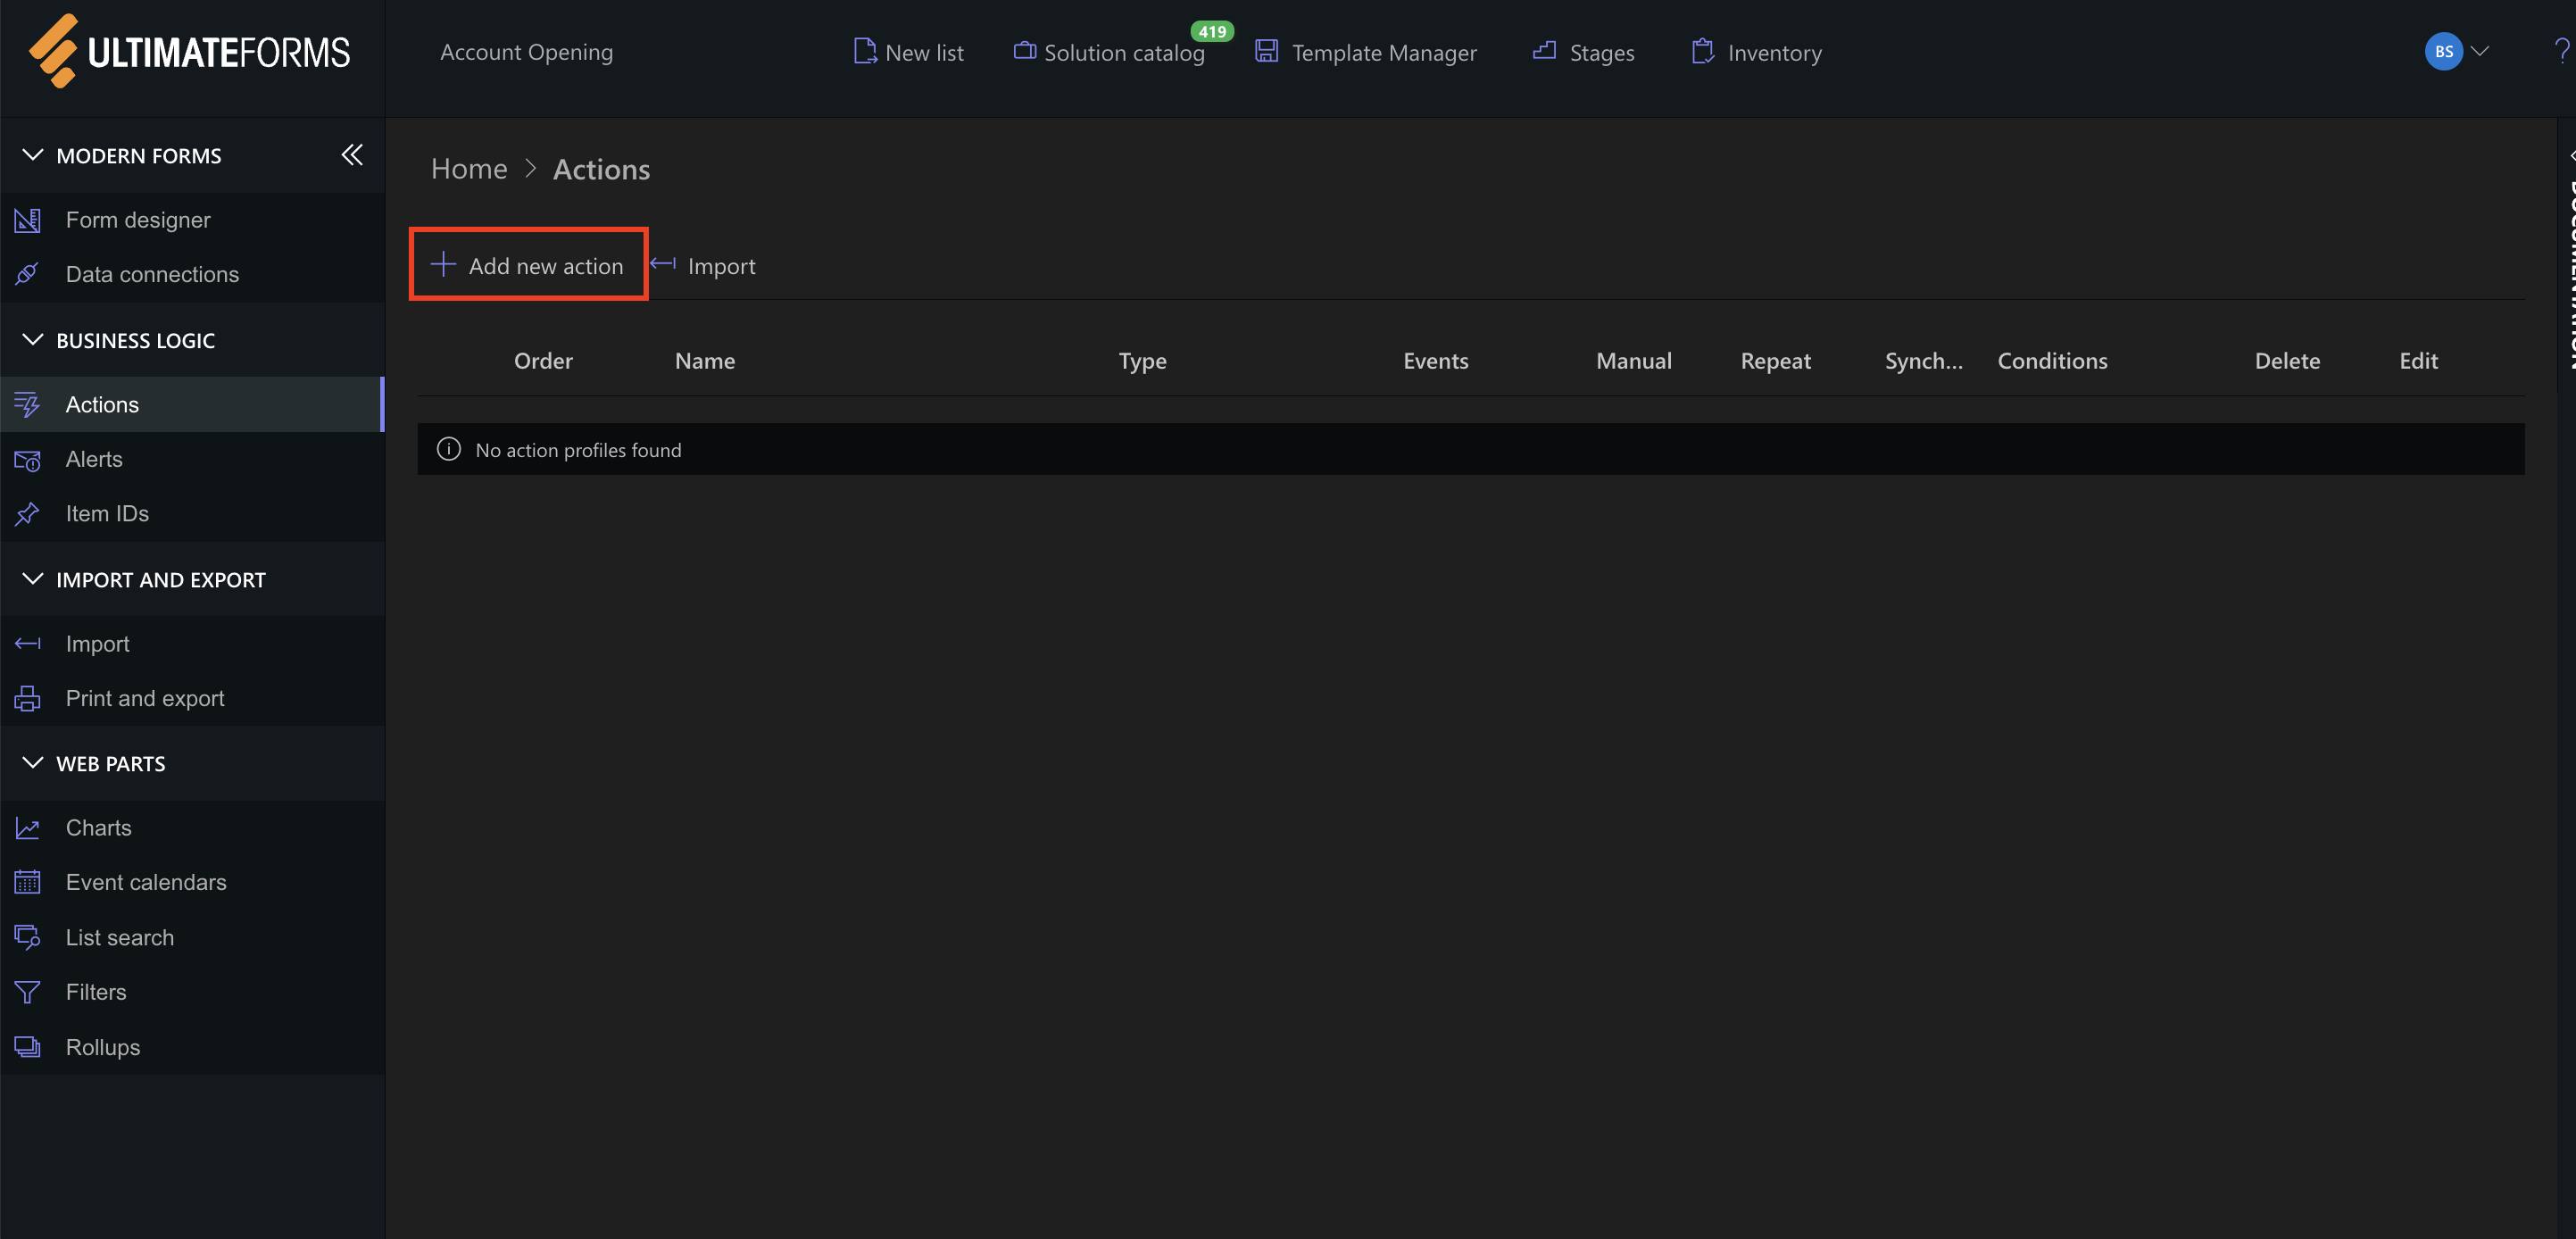
- Select Actions, then click New Action.
Step 2: Add a new Action and Choose an Action Type
1. Click Add new action
2. Choose an Action Type
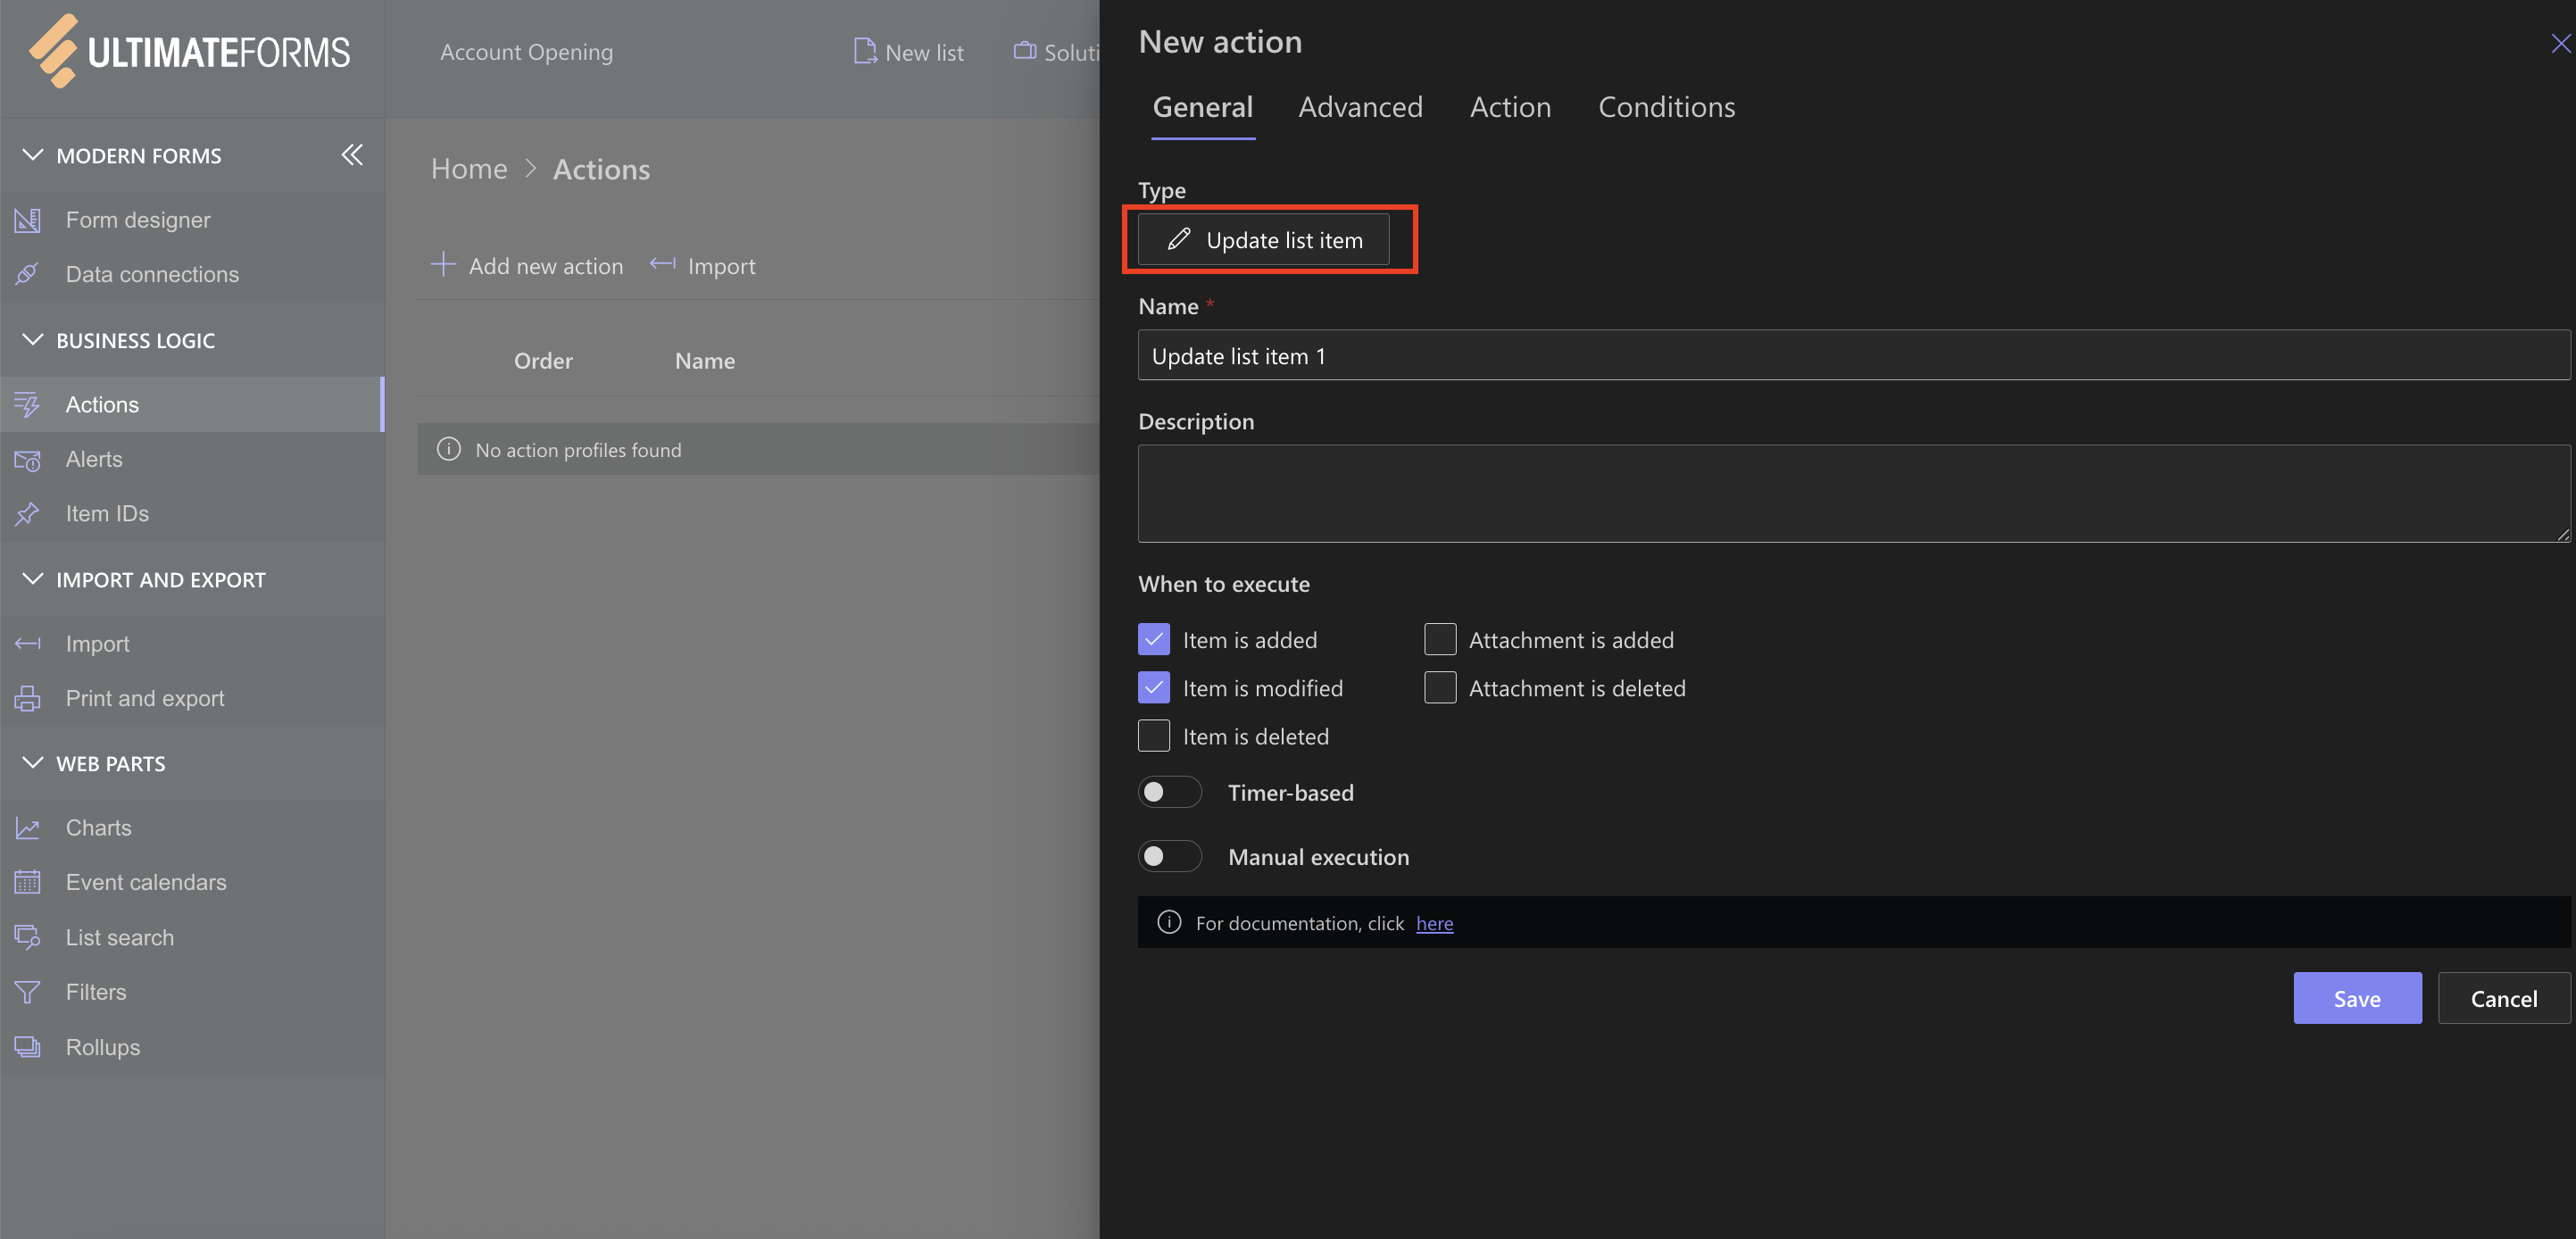
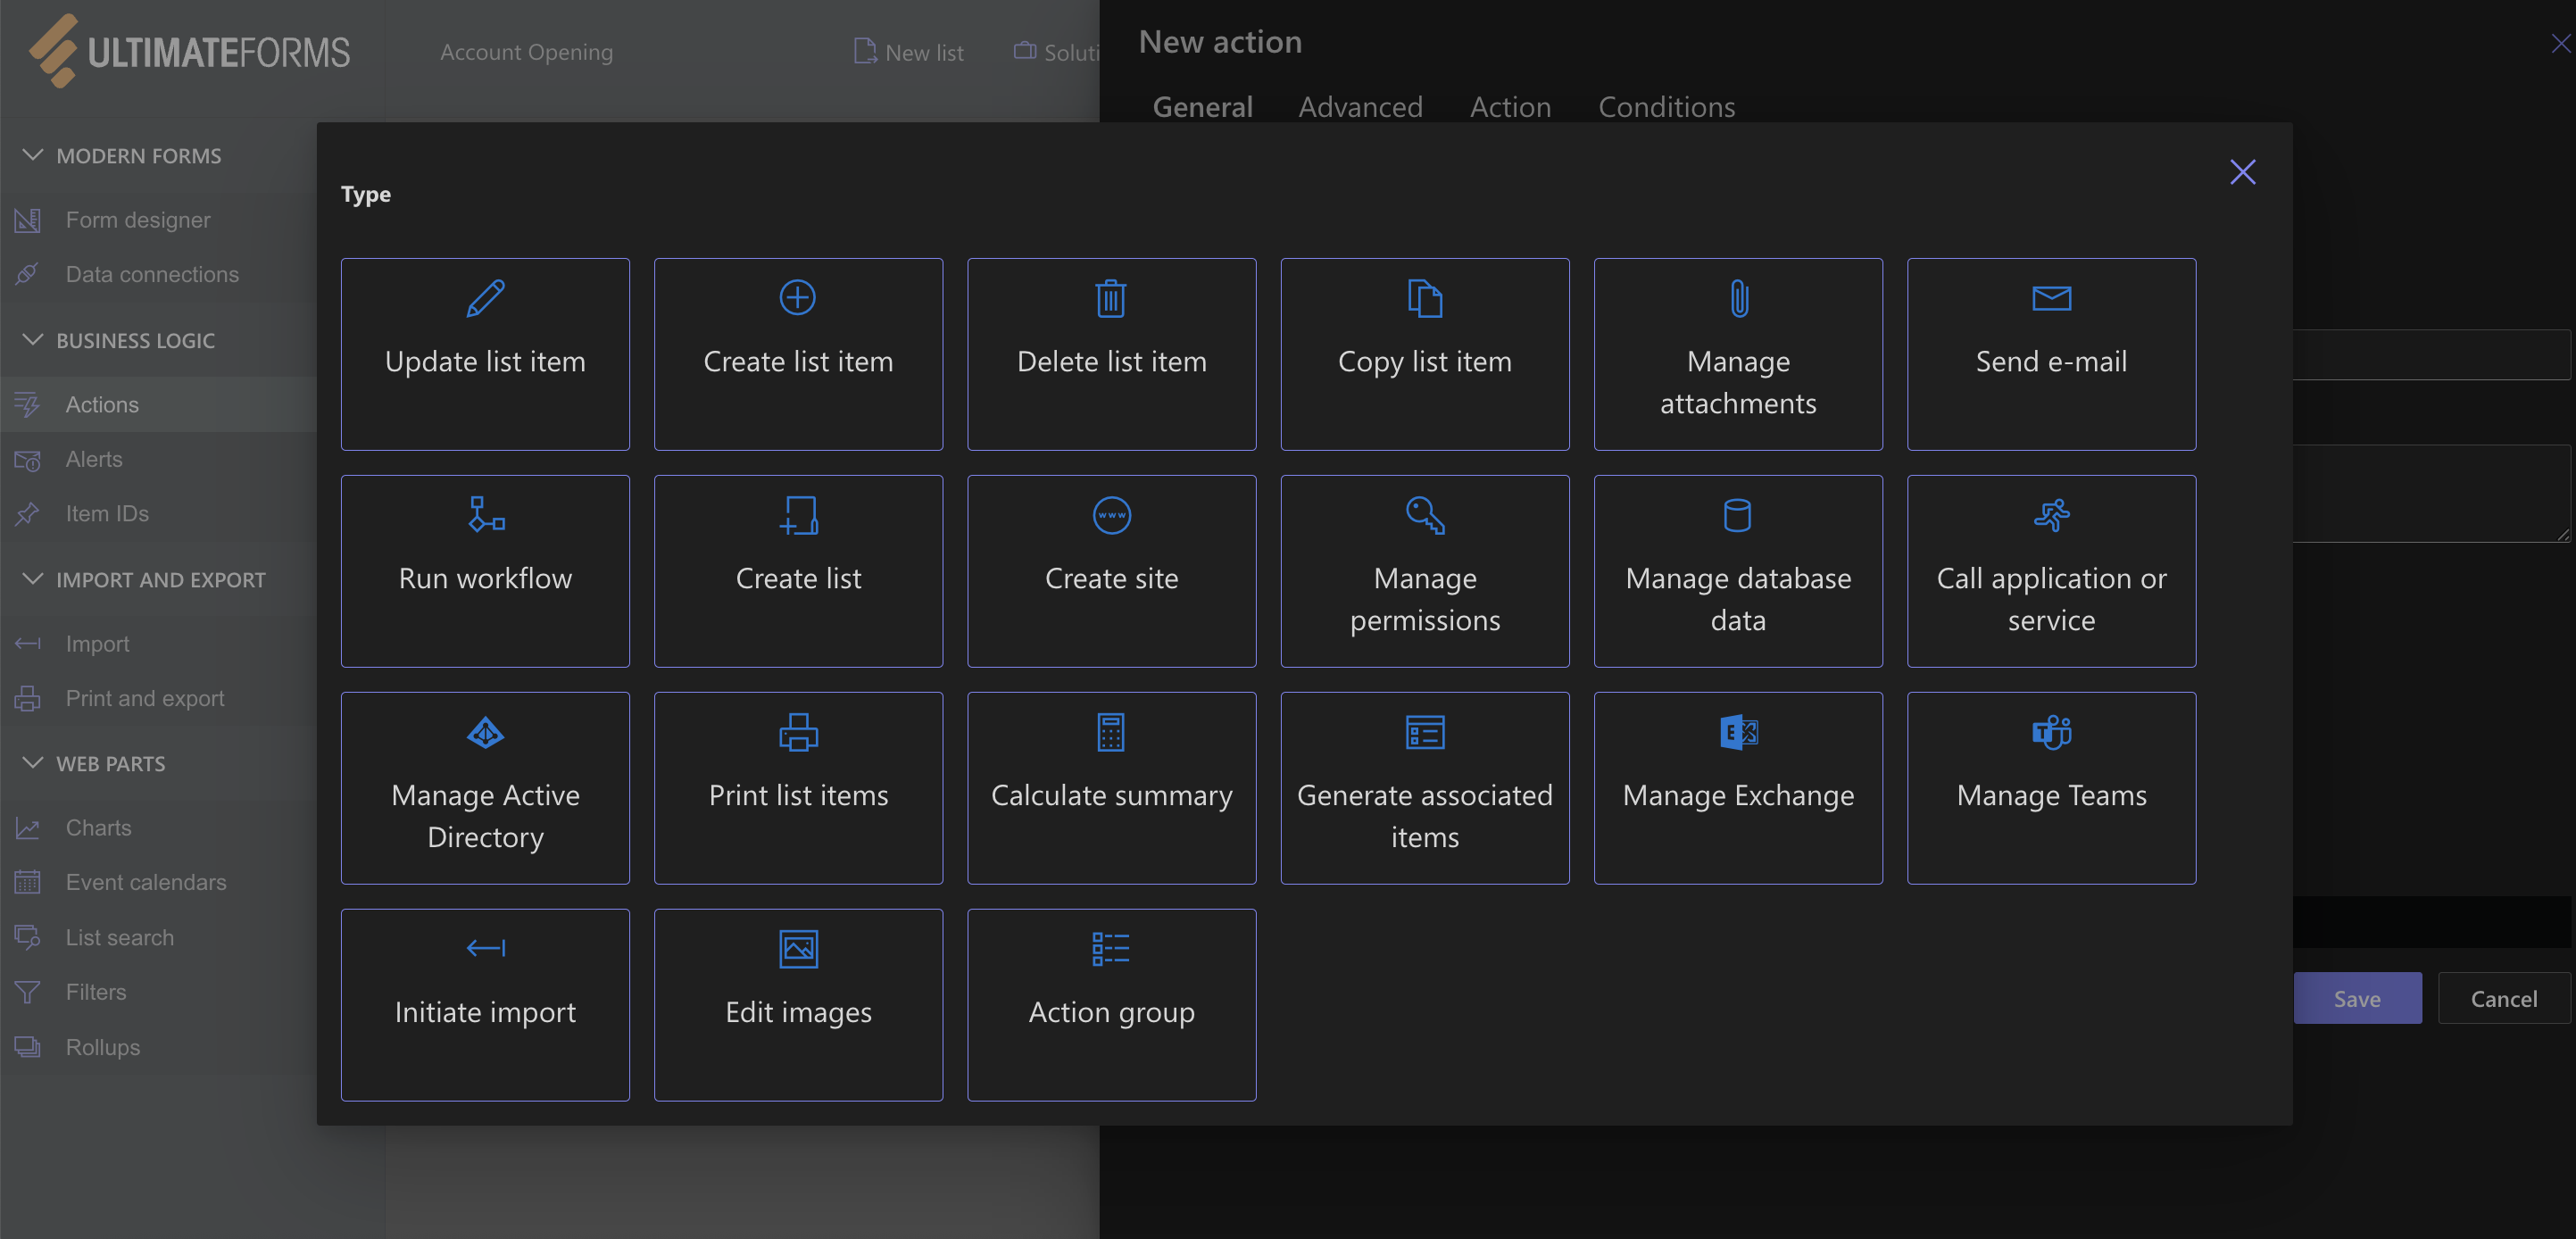
Available action types include:
- Update List Item
- Create List Item
- Delete list item
- Copy list item
- Manage attachments
- Create list
- Create site
- Send Email
- Run workflow
- Run DB stored procedure
- Call Application or service
- Manage Permissions
- Manage Active Directory
- Print list items
- Calculate summary
- Run PowerShell
- Generate Associated Tasks
- Manage Exchange
- Manage Teams
- Execute Import
- Action Group
Full list of types: Action Types Overview
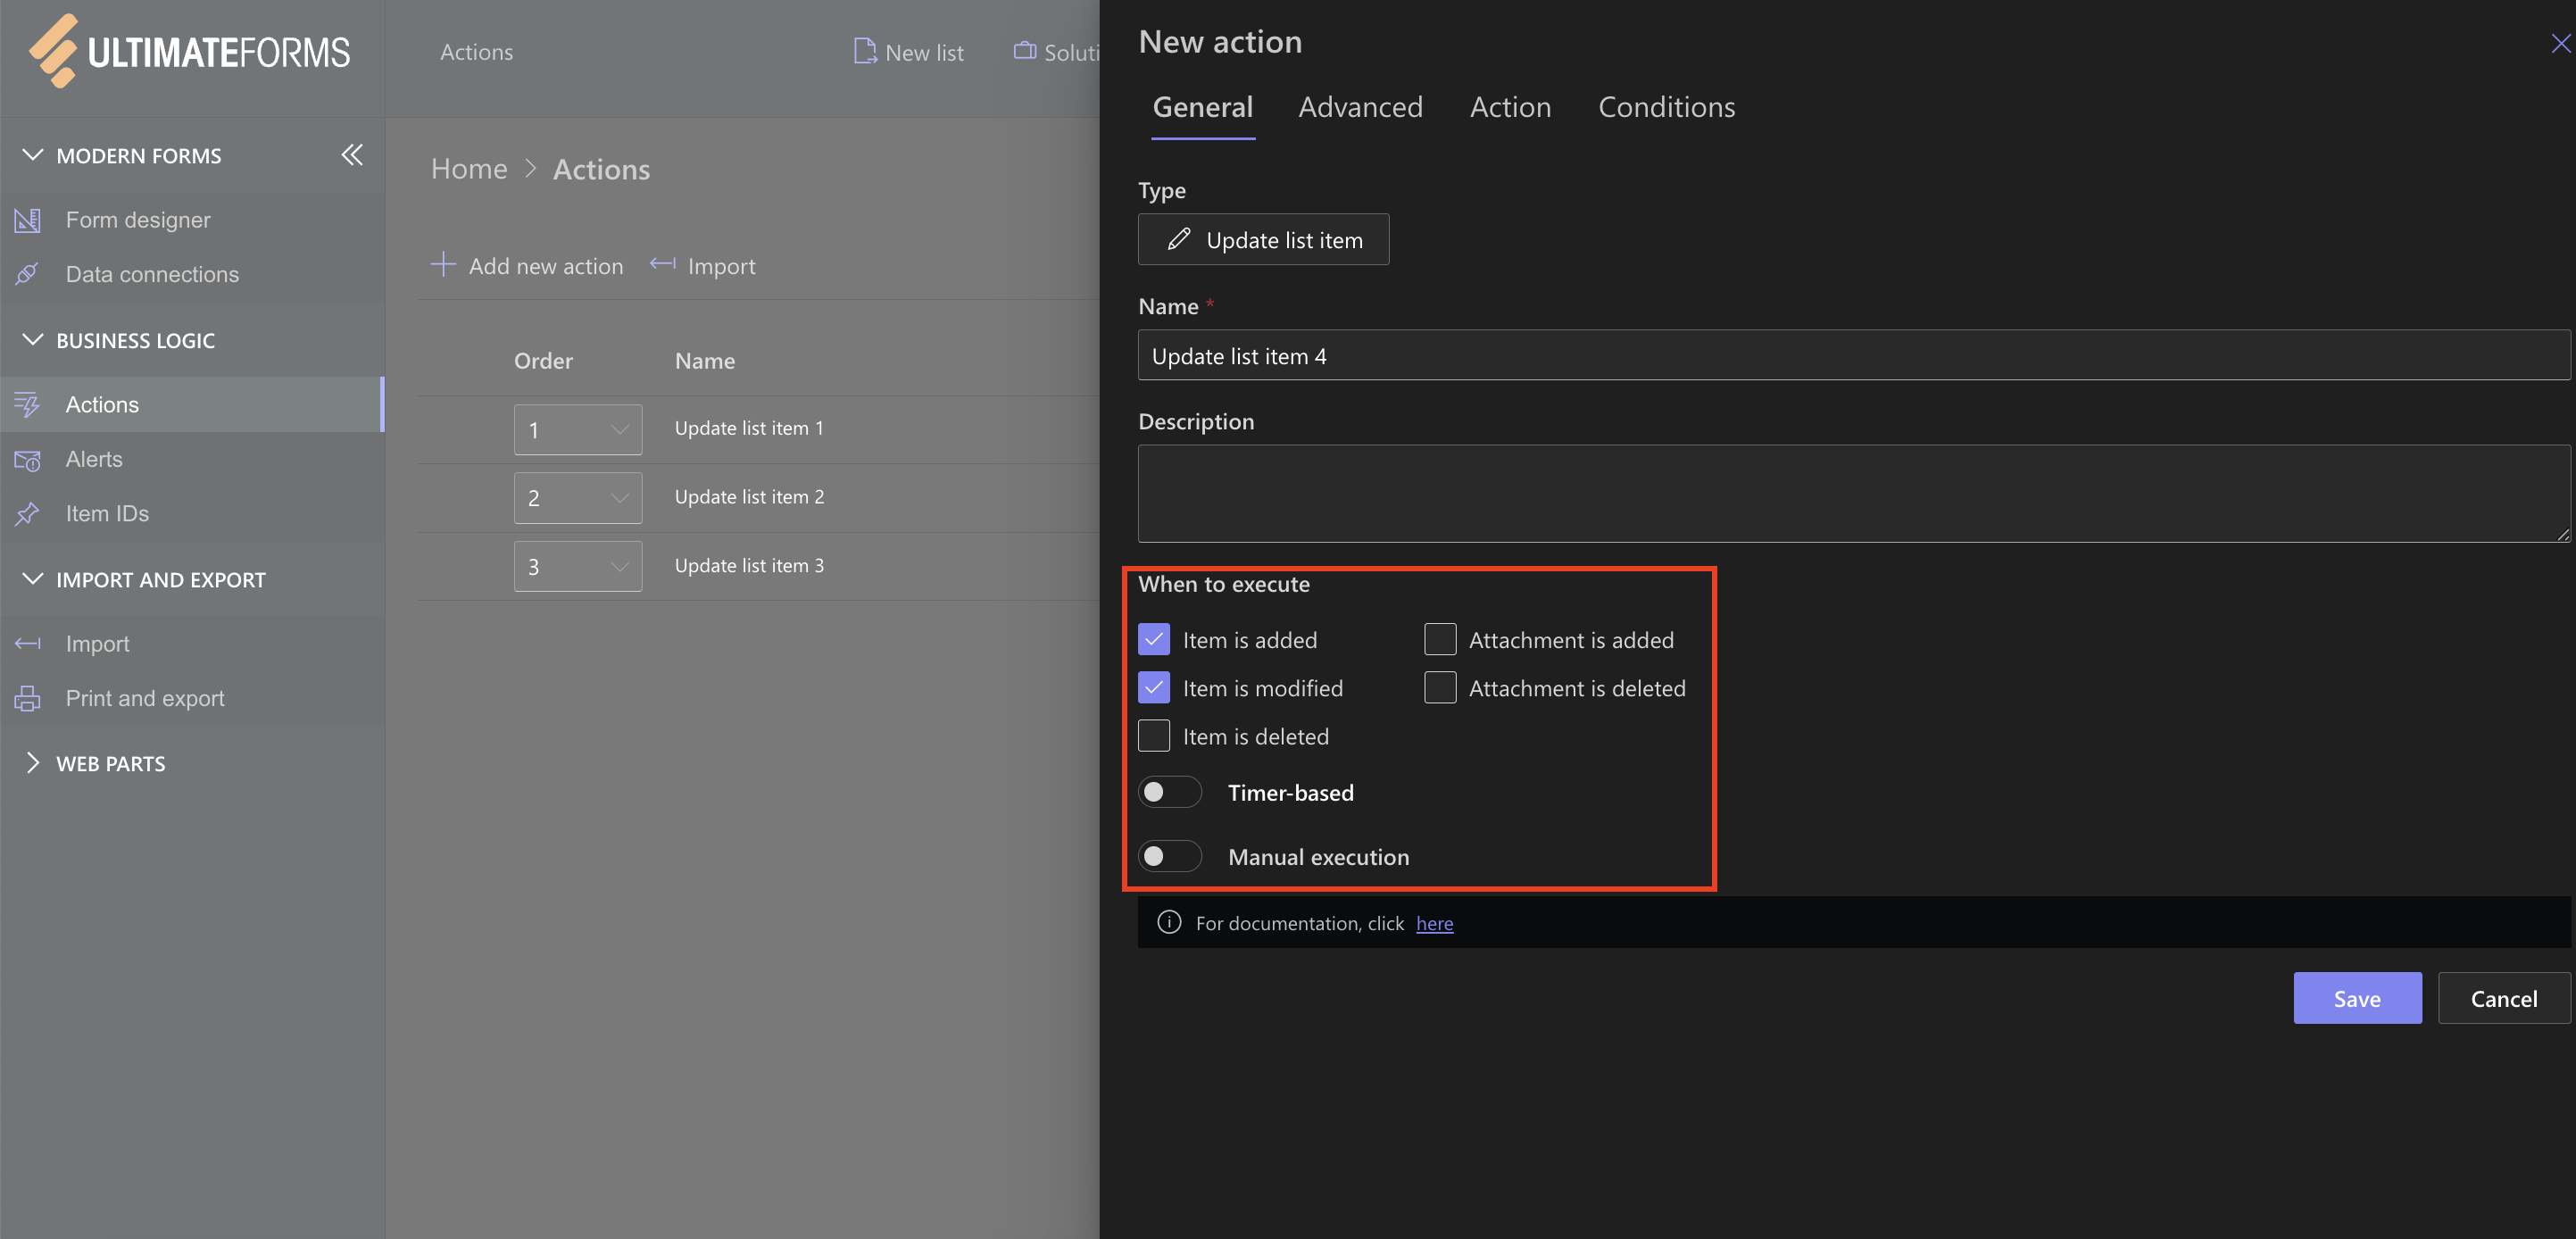
Step 3: Set the Trigger
Specify when the action should run:
- On item add, edit, or delete
- Manual execution via Run Action panel
- Timer-based(e.g., daily, weekly)
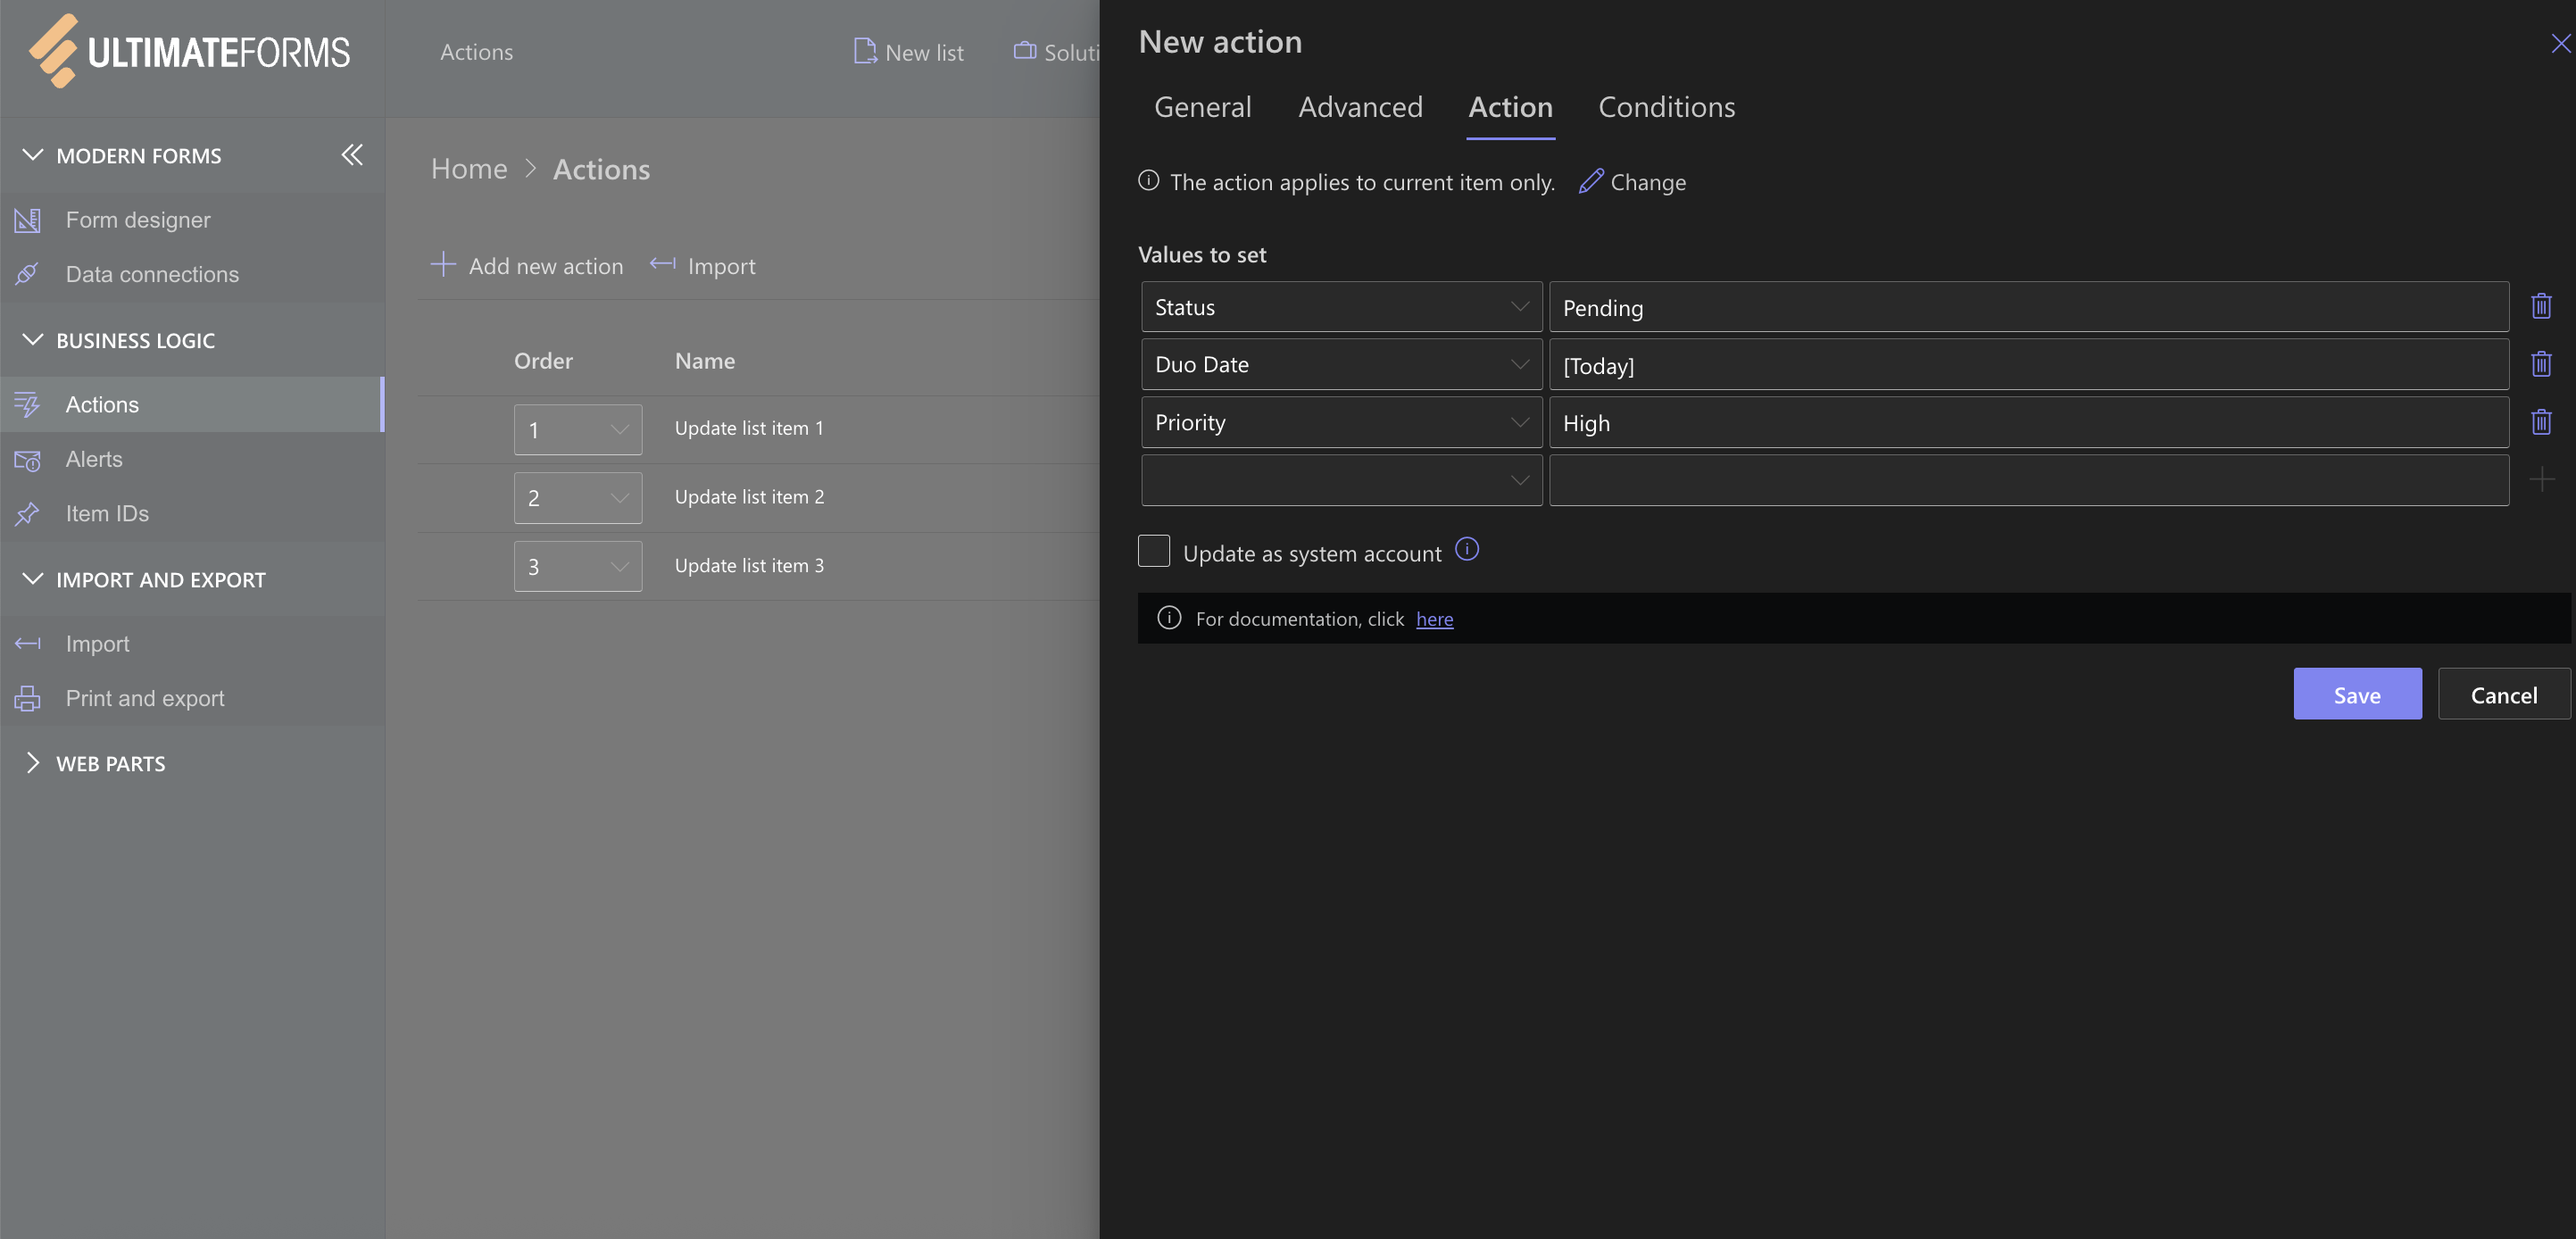
Step 4: Define Action Logic
Configure the action:
- Set values for columns using tokens like [Status], [Today], or [Priority]
- Create new items in other lists
- Set calendar appointments or Teams meetings
- Assign or remove permissions
Tip: Use dynamic column values and expressions to make actions smarter.
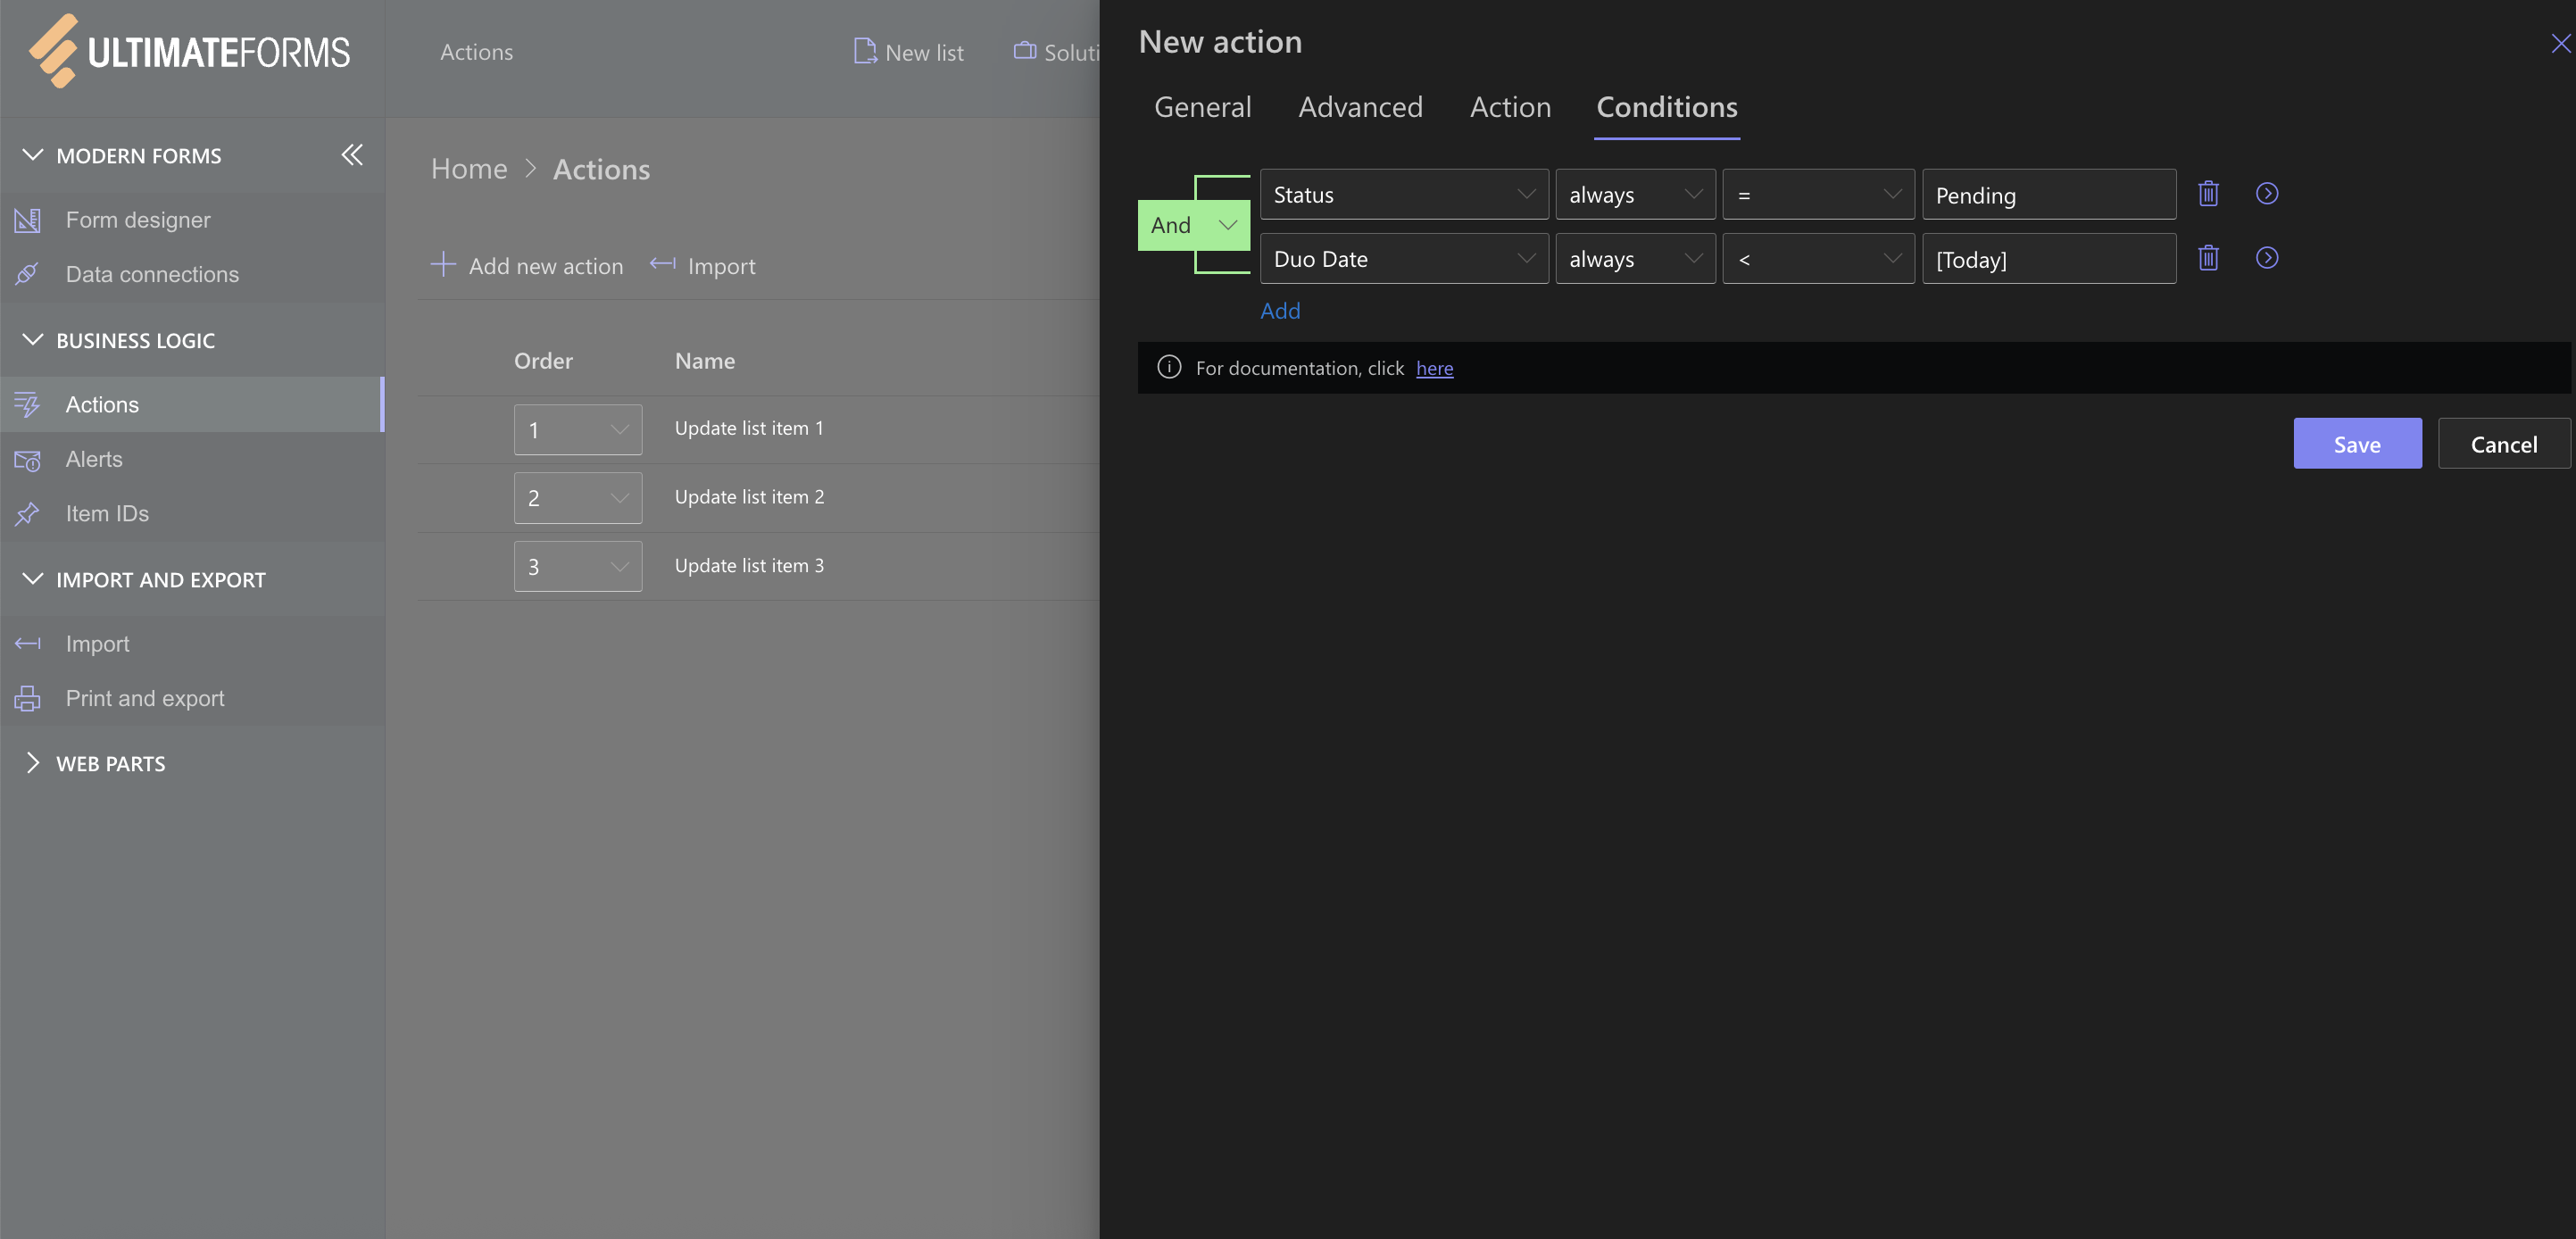
Step 5: Apply Conditions (Optional)
Use conditional logic to control when an action should run:
- Example: Only run when [Status] = "Pending" and [Due Date] < [Today]
- Combine with AND/OR logic
- Nest condition groups for complex logic
Step 6: Save & Test
- Save the action.
- Trigger it via form entry, edit, or the Run Action panel (for manual).

Tips & Best Practices
- Use Action Groups to chain multiple logic steps together.
- Add manual buttons to forms to allow users to run actions on demand.
- Combine with Dynamic Rules to show/hide form sections based on data.
- Test in a dev list before applying to production.
- Always test in a development list or test site first—check Action History for logs and troubleshooting.
Ultimate Forms: Actions are one of the most powerful features of Infowise Ultimate Forms, enabling deep automation without code. You can update items, assign permissions, send emails, trigger Microsoft 365 integrations, and much more—all through an intuitive interface.
Use Ultimate Forms: Actions to eliminate repetitive work, enforce process rules, and build business logic that’s easy to maintain.